Showing posts with label Rhiannon. Show all posts

Monday, March 29, 2021

Make a Wish ("Gummy Bear" Sneak Peek!)

 Hello! I've got a new card from Rhiannon to share with you today. Plus, this is the first official sneak peek at one of the newest Sparkle Blends from Doodles Paper Playground that will be released on Friday, April 2, 2021. We'll be doing a preview of the entire new collection on Thursday, April 1st on the Doodles Paper FB Page at 8PM EST.
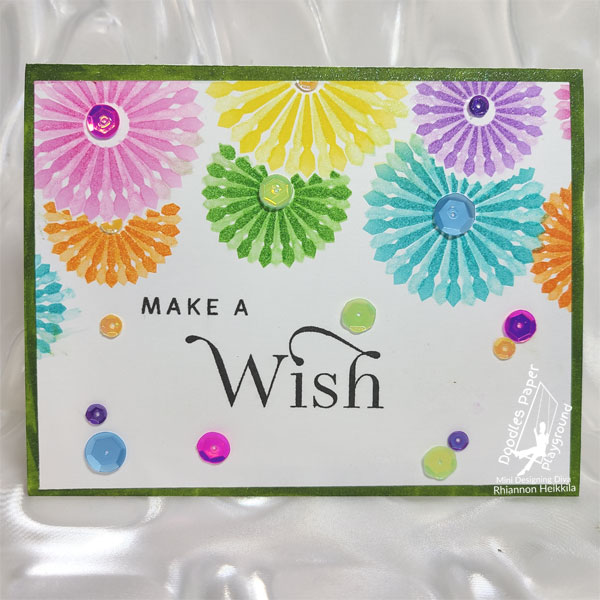
Drumroll please................... I give you, the "Gummy Bear" Sparkle Blend! You may love what you see on Rhiannon's card already, but I promise you, when you see what else is in this Blend (the name should give you a major hint!), you're going to definitely want it in your collection. Rhiannon wanted to make a birthday card for one of our neighbors, and based on the colors of ink she used, this new "Gummy Bear" Sparkle Blend was the perfect match.

She used The Greetery's Pinwheel Party stencils for her focal point. She used Distress Inks in Picked Raspberry, Wilted Violet, Peacock Feathers, Mustard Seed, Mowed Lawn, and Carved Pumpkin. She applied the first layer of each color heavy, and the second layer lightly (without adding additional ink to her blending brushes).
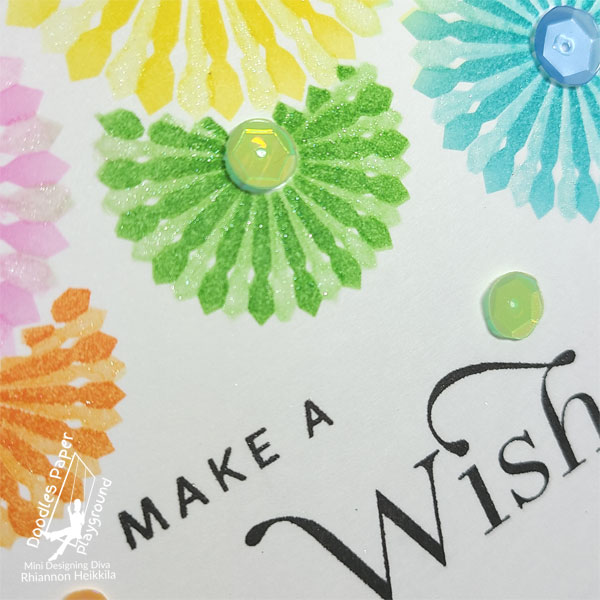
She added perfectly coordinated sequins from the "Gummy Bear" Sparkle Blend to the center of each of the pinwheels with On Point Glue. Rhiannon even cut the orange sequin, so it would appear to be under the pink pinwheel. She thought the card needed a bit more sparkle, so she carefully went over each pinwheel with the Crystal Sparkle Marker from Spectrum Noir. She also added a sentiment from The Greetery's Birthday Blooms stamp set in black.
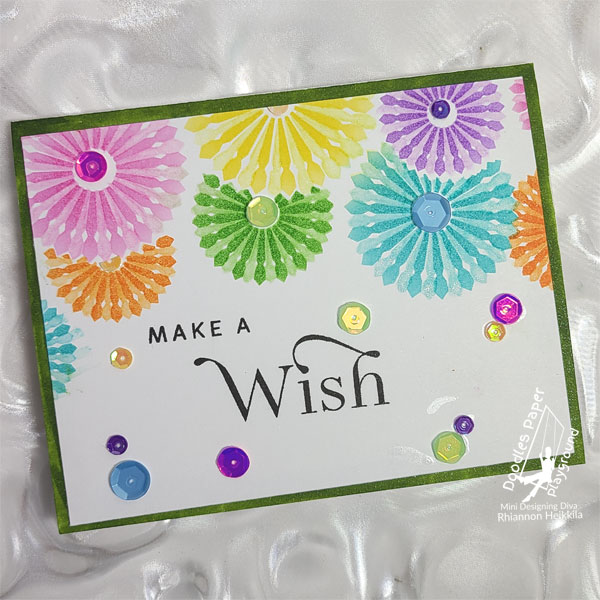
I absolutely love the vibrant, yet not overpowering, colors she chose to use on this card. It's so fun and happy, and the "Gummy Bear" Sparkle Blend couldn't have been a better match. Our neighbor loved the card, which of course made Rhiannon very happy. We look forward to sharing the complete new collection with you during our FB Live this week at 8PM EST on Thursday on the Doodles Paper Playground Page. Please be sure to visit the Sparkle Blends Shop on Esty to see the all of the available Sparkle Blends, as well as joining the Sparkle Blends Fan Club on Facebook. I'll have another new project to share with you soon. Thanks so much for stopping by. Have an inspiring day!

Sunday, November 1, 2020

Pastel Penguins

Hi, it's Rhiannon. Today I want to show you my Pastel Penguin card. It uses the new Pastel Penguin Sparkle Blend from Doodles Paper Playground's November 2020 release, that is available now. I saw the penguins from Clearly Besotted, and thought it would be fun to use a few and color them in pastels.


I stamped the 3 penguins with Memento ink and colored them with Copics. Then I fussy cut them. Next, I found the flower print background, which is from Echo Park's Just Be You paper pad. The colors worked really well with the Sparkle Blend and my penguins.


I die cut a window with Stampendous' Fitted Frames and used Tear It! Tape from Imagine to adhere the acetate. Then I used foam tape from Pear Blossom Press and put my Sparkle Blends inside the rectangle I made with the foam tape on the inside of the window. I got a piece of pink cardstock, and used that for the back of the shaker. I attached it to a cream card base, and that was it. I really love the penguins in the Sparkle Blend.


I made this card really quickly because as soon as I saw the Blend, I had an idea for how I would make the card. I think it's really cute, and I'm really happy with how it came out. The new Sparkle Blend release is available now, and there's a sale going on too. Please visit the Sparkle Blends Shop on Etsy to see all of the new release. Thanks for looking. Have a nice day!

Wednesday, August 5, 2020

Wonderland

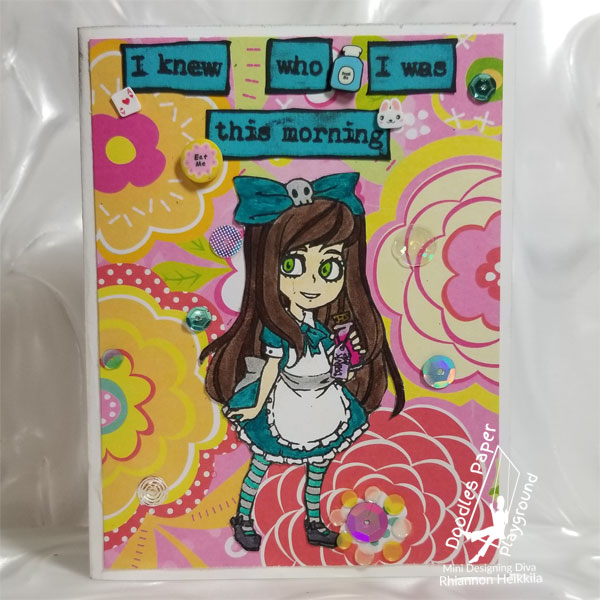
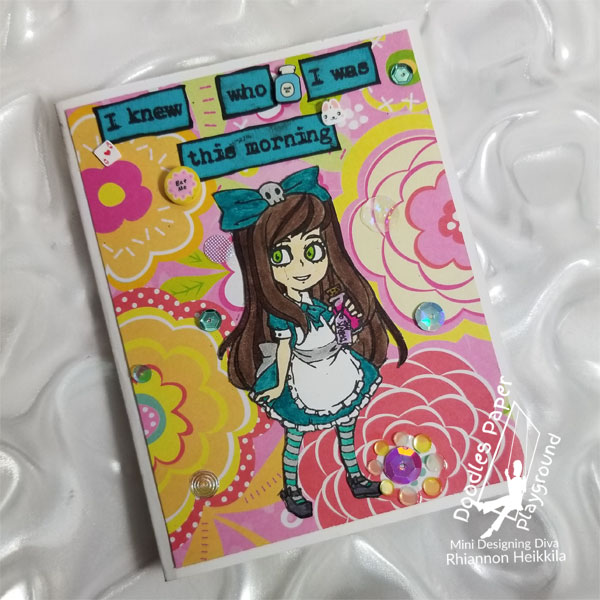
Hi, it's Rhiannon! From the new August release of Sparkle Blends, I really liked Wonderland and knew I had to do something with it. It has some cool things like a white rabbit, a "drink me" bottle, and an "eat me" cookie.

This image has an empty alt attribute; its file name is Alice-1-600.jpg

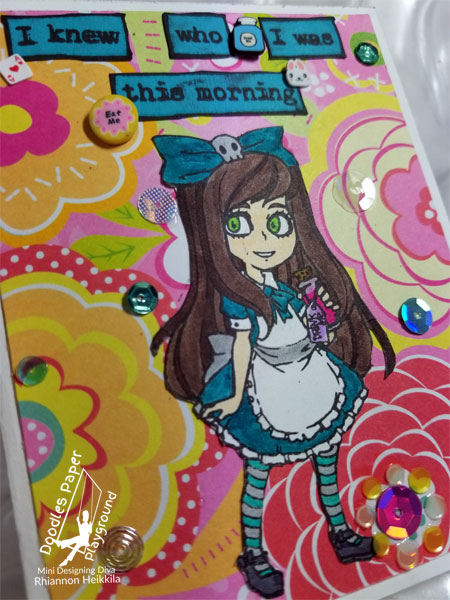
To make my card, I started by stamping Alice from the Visible Image set called "Alice in Wonderland." I thought it would be fun to make her brown haired like me and I made her dress a darker color. I colored her with Zig Clean Color Real Brush Pens.

This image has an empty alt attribute; its file name is Alice-2.jpg

After I colored her and fussy cut her out, I picked out a mat that's covered in flowers, because it reminded me of the flowers in Wonderland. I found a cardstock that matched Alice's dress, so I stamped the first half of the sentiment on it, and cut it out.

This image has an empty alt attribute; its file name is Alice-3-1.jpg

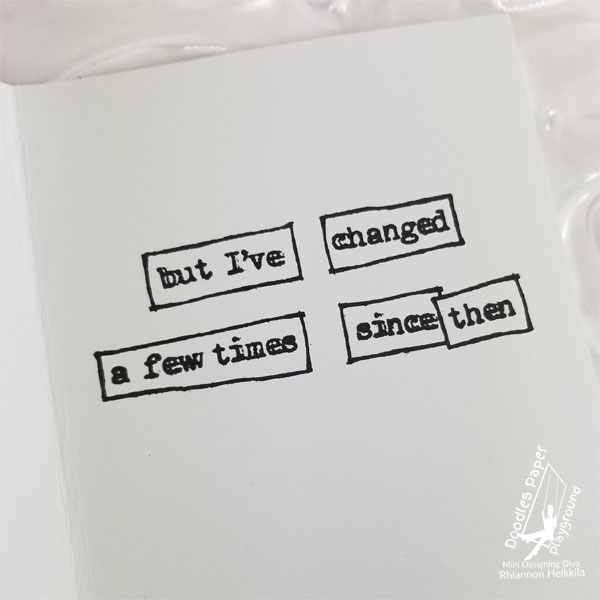
The second half of the sentiment I put on the inside of the card.

This image has an empty alt attribute; its file name is Alice-4.jpg

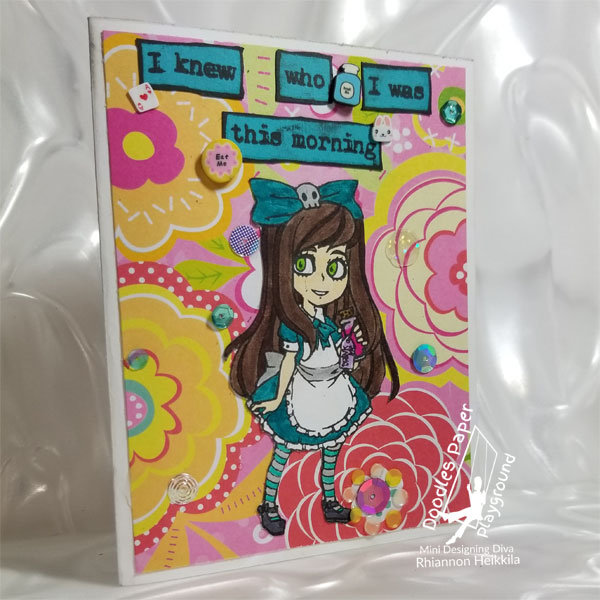
I put the clay pieces from the Wonderland Sparkle Blend around the sentiment and the sequins around the flowers. On one flower, I adhered the sequins to look like the center of the flower. Can you find it? I adhered all of the pieces with On Point Glue from Imagine.

This image has an empty alt attribute; its file name is Alice-5-600.jpg

It was fun to color her differently from how she is usually shown. I like that she looks more like me. I really like the colors and different sizes in the Wonderland Sparkle Blend. The clay pieces are really fun too. If you'd like to see the other new Blends (there's 12 in total!), you can go to the Sparkle Blends Shop on Etsy. Thanks for visiting. Hope to see you again soon!


Wednesday, March 25, 2020

Mushroom House

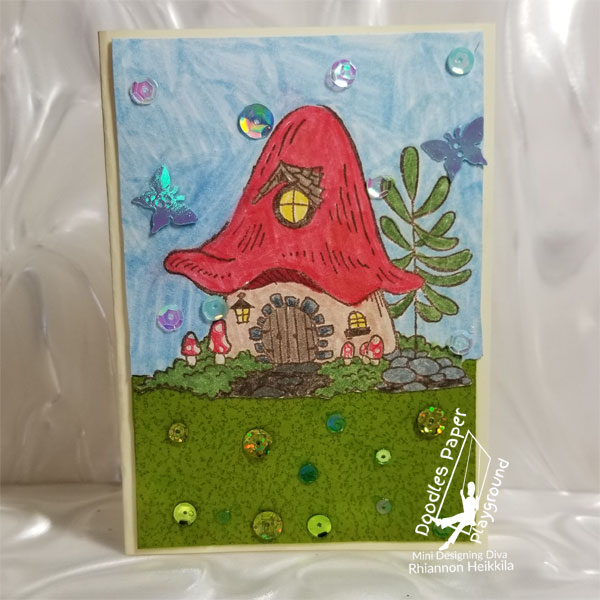
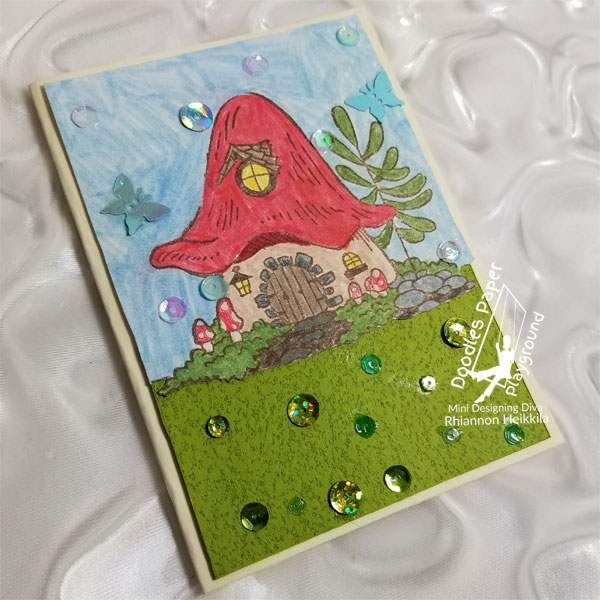
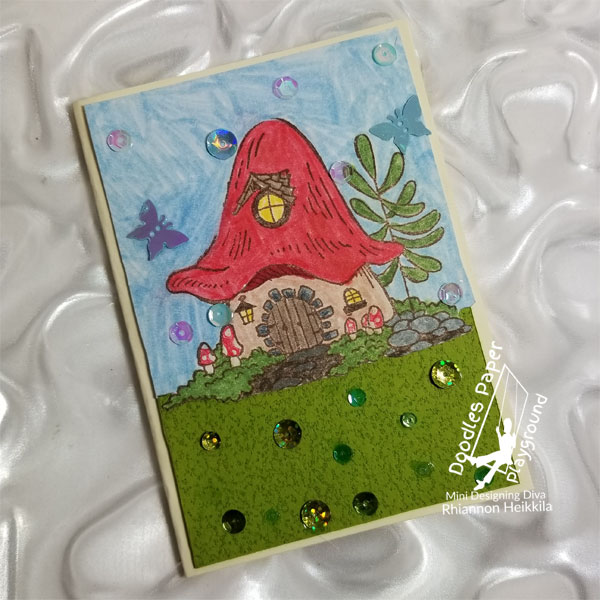
Hi, it's Rhiannon. You know that I love fairies and fairy houses, so I really like this old stamp from Stampendous. I used two Sparkle Blends from Doodles Paper Playground for this card, instead of one, like I usually do. I used Sweet Boy for the sky, and Emerald for the grass.
I stamped the mushroom house in brown so it would be softer and more natural looking. I colored it with Memento Markers from Imagine, like I always do. I had stamped this on a full card front, but I decided to cut off the bottom after I finished coloring it, so that I could put a green textured paper that looks like grass under it.
The Sweet Boy Sparkle Blend was perfect in the sky because of the butterflies in it. I like how they are fluttering around the mushroom house. The Emerald Sparkle Blend is great for the grass because it has different shades of green in it. I used the lighter colors of sequins in Sweet Boy, and the darker sequins in Emerald.

Making this card was a lot of fun, since I love fairy houses. I didn't want to use one Sparkle Blend because I wanted to keep your eye moving all over the card and not have it "heavy" in one place. I'll have another card to share with you soon. You can go and visit the Sparkle Blends Shop on Etsy. Thanks for coming, and stay safe.

Friday, March 20, 2020

Fairy Garden

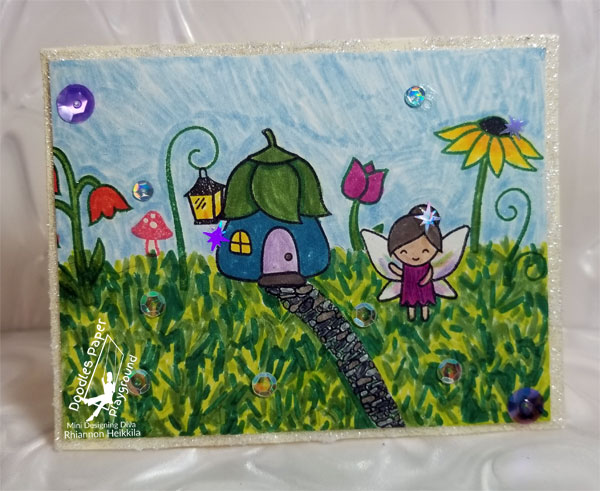
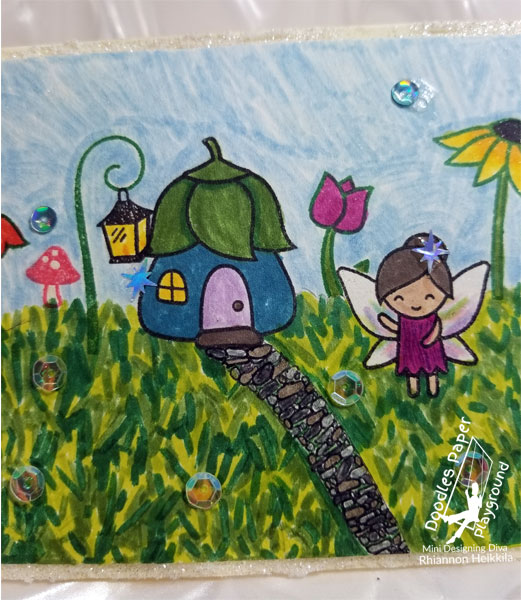
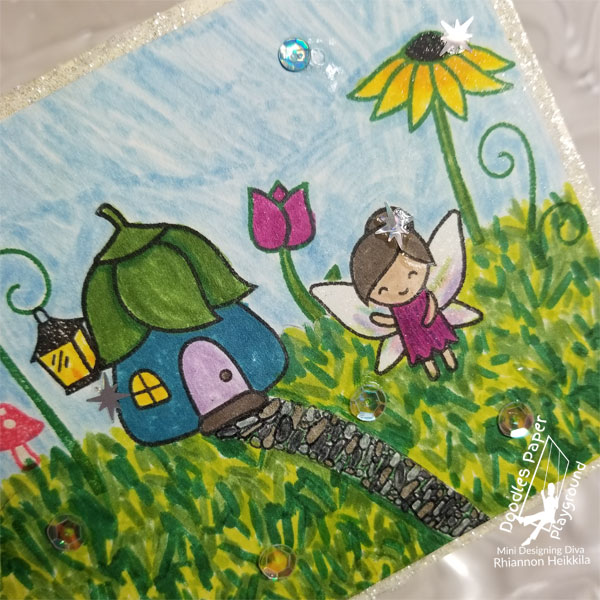
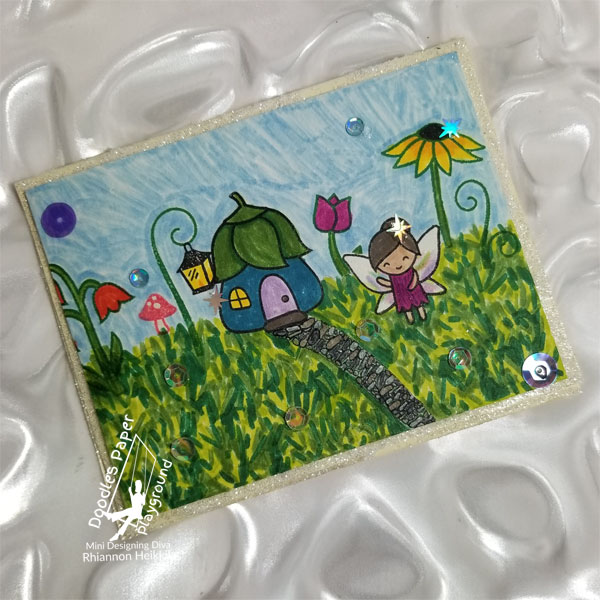
Hi, it's Rhiannon. I really love fairies, and I wanted to make a fairy card to share with you today. I chose the Pixie Dust Sparkle Blend from Doodles Paper Playground first, because I knew it would work with anything I made.
I started by stamping my fairy house and fairy, which is from Lawn Fawn's Fairy Friends stamp set. Next I colored them (with Memento Markers), and drew where the grass line should be. Then I drew the grass with the Memento Markers called Bamboo Leaves, Pear Tart, and Cottage Ivy. It took a while, but it came out really nice. Next, I made a mask of the fairy so I could stamp the tulips that's behind her. I finished stamping the rest of the flowers after that.
It was time to color in the flowers, and I added the little mushroom, which I inked up with the Ladybug marker. Next I made the path. I drew in every stone and then colored them. That took a long time too, but I am really proud of how it looks.
After I finished coloring the picture, I added Wink of Stella (a glitter marker) to the fairy, the door of the house, all the flowers and a little in the sky. You can't overdo it! Now it was time for me to pick out the sequins I wanted to use from the Pixie Dust Sparkle Blend. I really like the holographic star bust sequin that I put in the fairy's hair and in other spots of the card. I attached all of the sequins with On Point Glue. I cut out a cream card base, folded it, and applied Glitz Glitter Gel from Gina K Designs in White. Like I said, you can't have too much sparkle!

I like how the card ended up after all of the work. My favorite part is the path. I also really like how i colored the fairy's wings. I used a few pastel colors to make them look iridescent. And the Pixie Dust Sparkle Blend makes the scene feel magical. Thanks for coming! Have a good day!

Monday, February 24, 2020

Reach for the Stars

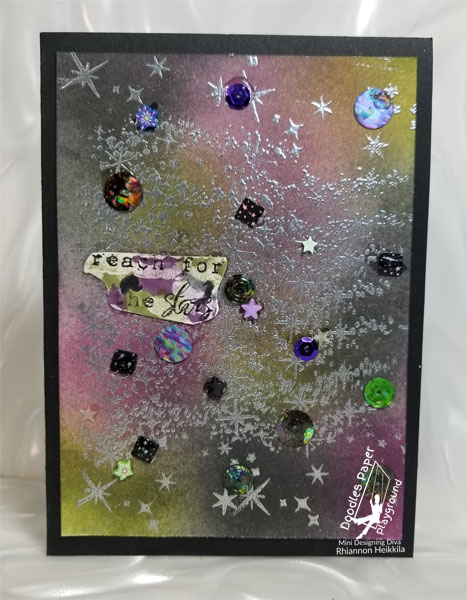
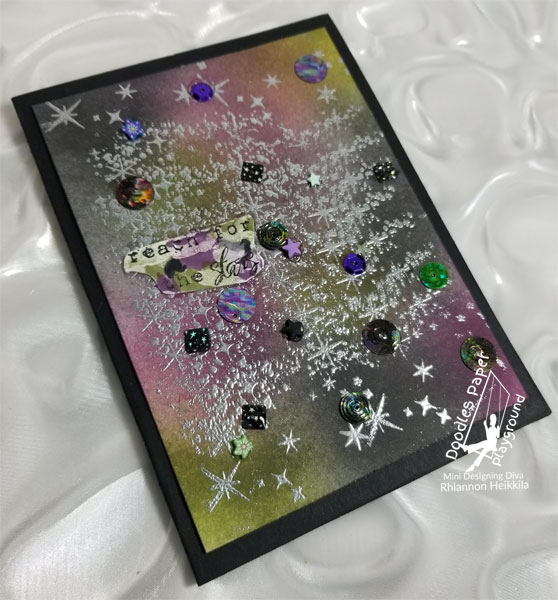
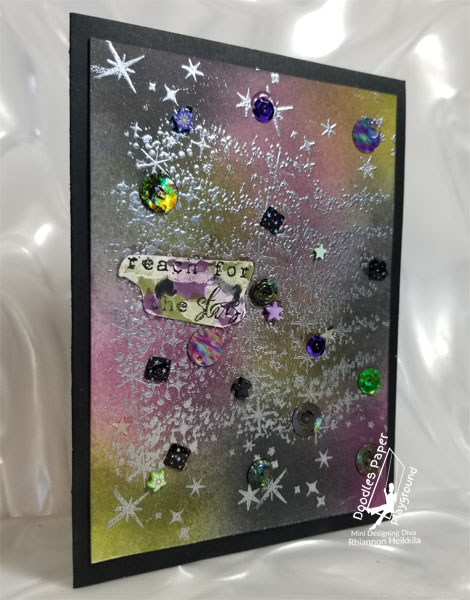
Hi, it's Rhiannon. Today I have a card using the "Nebula" Sparkle Blend from Doodles Paper Playground. I really like the big sequins that's in this Blend. They look like planets. I liked the idea of doing a nebula as the background, for the Nebula Blend.
First I cut a small mat of cardstock and inked blended it with Distress Oxides in Peeled Paint, Seedless Preserves, and Black Soot. After it was dry, I took the stars from the Hero Arts' Dreams are Made stamp set and stamped it with VersaMark Ink. Then I embossed it with Detail Silver Embossing Powder from Stampendous. I repeated this a bunch of times until I was happy with the background.
Then I took the sentiment, which was from the Voyager stamp set from AALL & Create and stamped it on a separate piece of cardstock. I split the sentiment in to 2 lines, instead of how it is in one line. I cut it out and I added color with Memento Markers. The colors matched the background really well. I used Tuxedo Black, Elderberry, and Pistachio.
Next I poured out some of the Nebula Sparkle Blend on to a piece of scrap paper, and I placed the sequins where I wanted them on the card. I glued them down with On Point Glue and I attached the background to my black card base.

 I liked how I embossed the silver stars. This Blend has some glow in the dark stars in it. I think they're cool, and I added 2 to my card. The "planet" sequins in this Blend are really unique and fun. I know I'll use it again soon. Don't forget to visit the new Sparkle Blends Shop on Etsy. Thanks for stopping by!

Friday, January 24, 2020

Fairies are Awesomesauce!

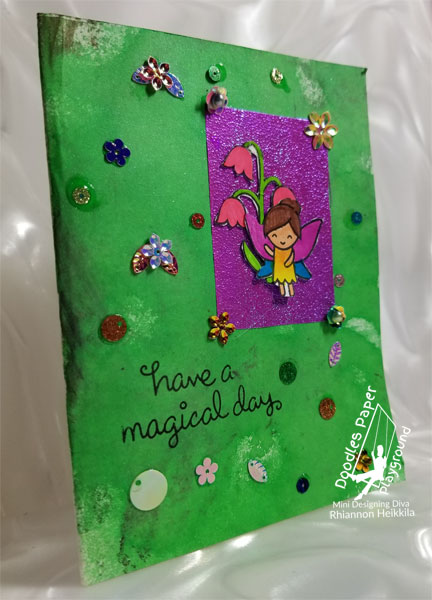
Hi, it's Rhiannon! The Awesomesauce Sparkle Blend from Doodles Paper Playground inspired me to do something colorful for my card today. Then I found the Iridescent Shimmer Paper in Lilac and I thought I should do something with fairies. I knew this would wind up being very colorful.
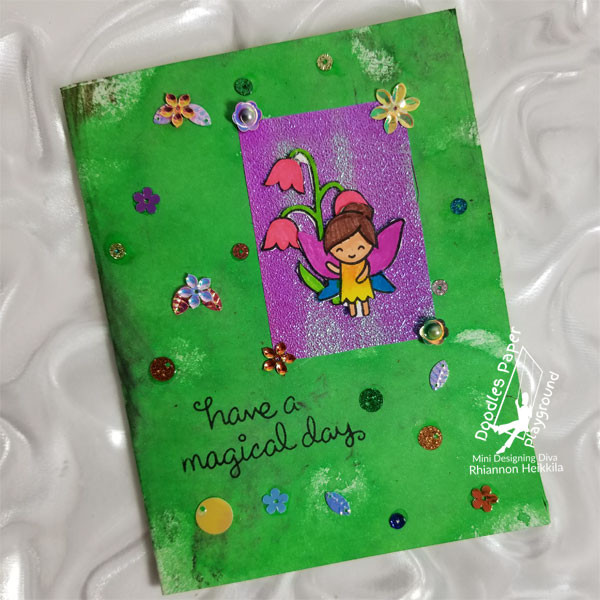
First, I stamped and colored my fairy and flower. They're from Lawn Fawn's Fairy Friends stamp set. I colored them with Arteza's Real Brush Pens. After I cut out the fairy and flower, I drew a rectangle on the card base, so I knew where I wanted to put the Lilac paper. Next, I used Cottage Ivy Fireworks! Spray from Imagine and I sprayed the card base an awful lot! It's super shimmery.
Then I redrew the rectangle and measured it so that I could cut it from the Lilac paper. It's 1 3/4" x 2 1/2." I glued the fairy and the paper, and then I stamped the sentiment. The sentiment was originally on one line, but I decided I liked it better on two, so I stamped the first half, and then the second below. Next I arranged all of the sequins. I love all the colors and shapes in the Awesomesauce Blend, and I like putting the flowers together with layers of leaves or beads. I layered things in 4 spots on this card. Can you find them??? I adhered them all with On Point Glue from Imagine.

I like how sparkly and shiny this card is. And, it's magical. I liked layering the flowers a lot. It adds extra dimension. Thanks for coming! I'll have another card soon.

Wednesday, November 20, 2019

Mermaid on a Rock

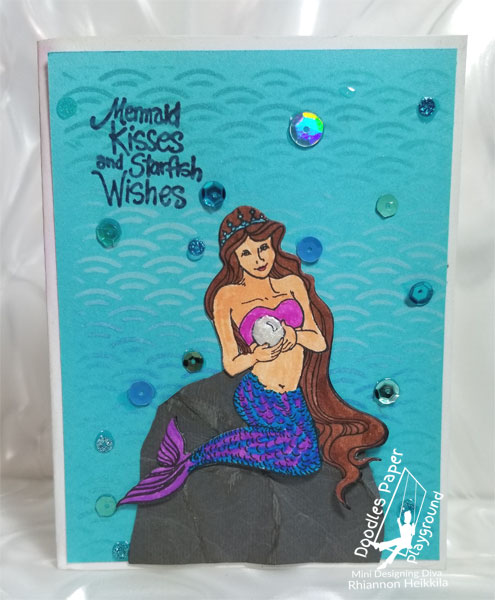
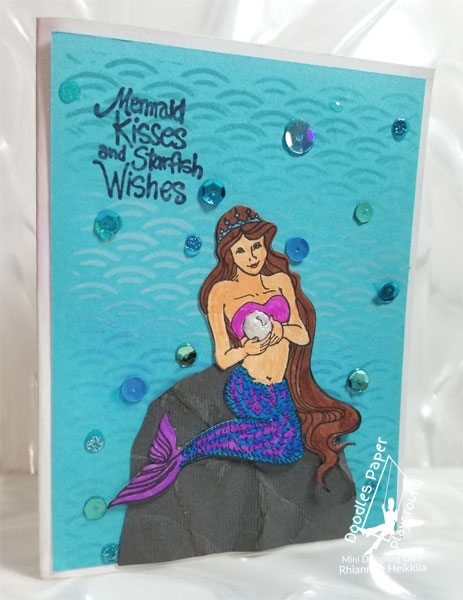
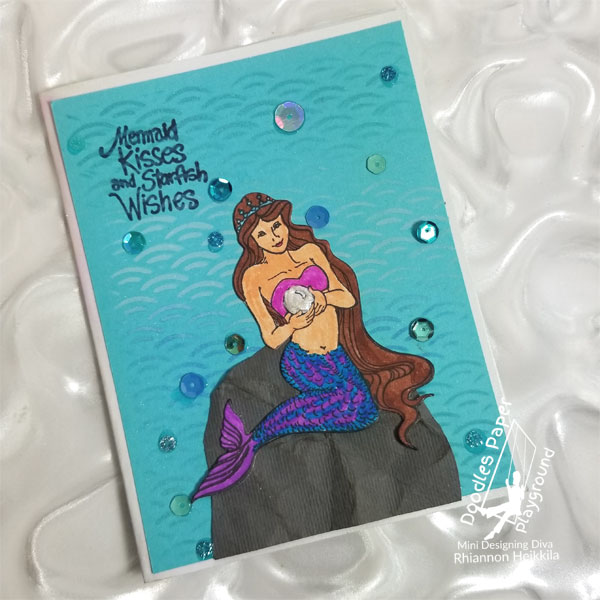
Hi, it's Rhiannon. I needed to make a "thank you" card for someone and I got this pretty mermaid stamp and die set from Stampendous that I was excited to use. I thought the "Aquamarine" Sparkle Blend from Doodles Paper Playground would look good with the mermaid.
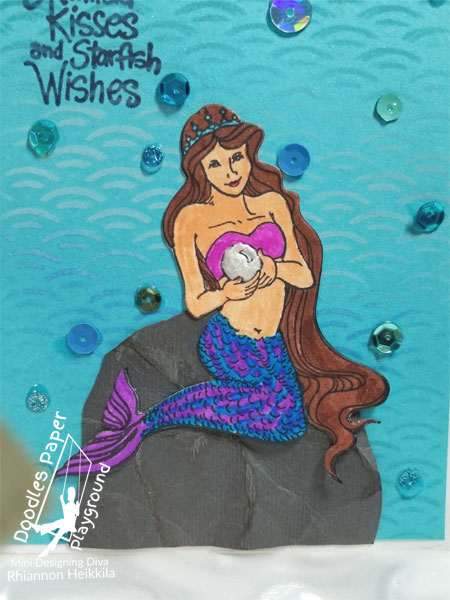
I colored and die cut the mermaid first so that I could figure out how I wanted to make the rest of the card. I colored her with Arteza markers and Sparkle Markers from Crafter's Companion (on her tail and crown). For her pearl, I used Ivory Seashell Nuvo Drops.
Next, I made the background. I used a stencil from Stampendous and 3 Distress Oxides. They were Salty Ocean, Peacock Feathers, and Weathered Wood. I applied them with Mini Ink Blending Tools. Then, I sprayed the background with Sheer Shimmer Spritz in "Sparkle." I really like the background I did because it's so sparkly, and it goes really good with the mermaid.
For the rock, I cut a half oval out of dark gray cardstock. Then I crumpled it up. I uncrumpled it and rubbed on silver metallic paste. It looks like a wet rock! I really like the texture. The Aquamarine Sparkle Blend has different shades of blue and green that I liked with this card. It reminds me of water splashing. I glued them on with On Point Glue. Then I added my sentiment (from Stampendous' Ocean Wisdom stamp set) with Twilight VersaFine Clair ink. I also painted the border of my card base with silver Twinkle H2O's. It's really sparkly in real life!

I really like how my card turned out. I think the Sparkle Blend went really good with the rest of my card. You can see all of the Sparkle Blends at White Rose Crafts. Have a great day!

Friday, October 11, 2019

Halloween Pumpkin Patch

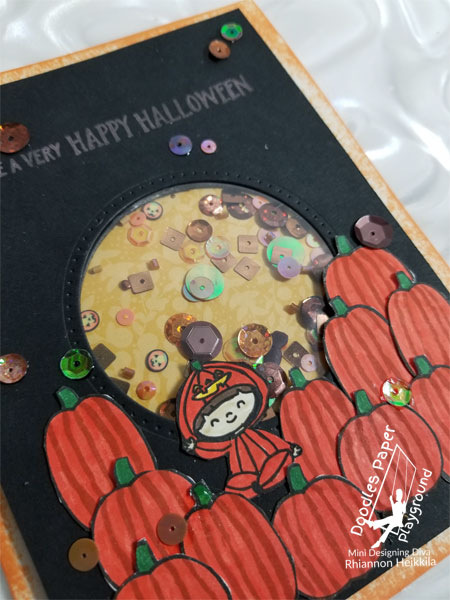
Hi, it's Rhiannon. Today I have a Halloween card. Halloween is one of my favorite holidays, so I was excited to make a card with that theme. The new "Pumpkin Spice" Sparkle Blend from Doodles Paper Playground is really cool because there are lots of little pumpkins in there. I used that for my shaker.
I started by stamping an coloring the boy dressed as a pumpkin. He's from Clearly Besotted. I colored him with Memento Markers. Next, I stamped the pumpkins, which are from Lawn Fawn's "Pick of the Patch" stamp set, and also colored them with Mementos. After I cut out the pumpkins and the boy, I was ready to make the shaker.
I cut a large black mat and die cut a medium sized circle near the bottom. The die is from Elizabeth Crafts Designs. Next, I got a piece of acetate and glued it under the die cut circle. Then I die cut black craft foam with the same medium circle to use instead of foam tape. After that I chose a patterned paper (DCWV) for the back of the shaker window. Then I put the Sparkle Blend inside the window and glued everything together. The teeny pumpkins in it are my favorite.
Once it was all glued together, I got a large card base and inked the edges with Tangelo Memento Ink. Then I glued my shaker on to my card base. Then I took my pumpkins and boy and placed them where I wanted them. Next, I glued them all down. Then with the same "Pick of the Patch" stamp set, I stamped "Have a very Happy Halloween" with Ripe Persimmon Distress Oxide ink. Lastly, I positioned my extra sequins and glued them down with On Point Glue.

I like how this card came out. I had fun cutting and positioning my pumpkins like a pumpkin patch. It's just perfect for Halloween. I'll be back soon with another project. For now, you can visit the White Rose Crafts shop to see all of the new Sparkle Blends, and use my mom's code, "Alison 15" to save 15% off of your purchase. Have a nice day!

Sunday, October 6, 2019

Opal Fairy

Hi, it's Rhiannon. Six new Sparkle Blends came out from Doodles Paper Playground this month, and I am excited to show you the "Opal" Sparkle Blend. I was organizing my new Sparkle Blends into my storage container, and I was looking at "Opal" and I thought I wanted to do something with it because it was a really cool Blend. I like it because of the nice colors with the white sequins.
I started by stamping the fairy (from Craftin' Desert Divas) with VersaFine Ink. After I stamped my fairy, I colored it with Memento Markers in pastel colors and a Tombow Marker for her skin. Mom put swirls on her wings for me. After I colored her, I cut her out and made a mat of the the sparkly gold glitter paper.
For my sentiment i used two different stamp sets from Lawn Fawn. I used Baked with Love and Fairy Friends. I cut them apart after I inked them and pieced them together to make my sentiment.
Next, I glued it all together. Once it was glued, I got out the Sparkle Blend that I was using, and chose where I wanted it. After that, I used On Point Glue to attach the sequins to the glitter paper. I used a Memento Marker in Angel Pink to apply color around the edge of the card base.
I believe this card came out really good because the Sparkle Blend works perfectly with the marker colors I chose. And look at all that glitter! I'll have another project for you soon. Please visit the White Rose Crafts shop to see all of the new Sparkle Blends. See you soon!

Friday, September 20, 2019

Unicorn and Flowers

Hi, it's Rhiannon. I made this card for my friend's birthday. I like using flowers on my cards, so the Flower Power Sparkle Blend from Doodles Paper Playground was perfect.
I saw the unicorn stamp from Lawn' Fawn's Critter Ever After set, and thought it would be really cute. I stamped it with VersaFine ink in Black Onyx and colored it in with Memento Markers, which are my favorite. Then I took the clear Spectrum Noir Sparkle Marker and colored the whole unicorn with it, except for the hooves and the horn. For those, I used a gold glitter marker from Crayola's "Art with Edge" collection. Then I die cut the unicorn. I also stamped, cut, and colored 3 stars.
I did my background next. I cut a small mat and inked the Spectrum Kaleidacolor ink pad from Imagine on to a brayer. After I rolled the ink on to my paper, I used Gold Sheer Shimmer Spritz all over the background.
Then I made the card base and glued the background on to it. Next I glued on the unicorn and stars. After that, I took out the Flower Power Sparkle Blend and chose some flowers. I like this Sparkle Blend because of the all the different colors and shapes of the flowers. I positioned the flowers and then glues them with On Point Glue from Imagine.
I like how I put the cluster of flowers by the unicorn's feet to look like she was stepping on them. Softly of course. I like how I scattered all the other flowers around it. I think this Sparkle Blend was really cut to use with the unicorn and the multicolored background. You can get many of the products I used today from White Rose Crafts. Have a good day!

Sunday, September 8, 2019

Pixie Dust Fairy

Hi, this is Rhiannon. Today I have a card that I made very quickly because I used things that were already colored and cut. I used the Pixie Dust Sparkle Blend from Doodles Paper Playground because I thought it went really good with the fairy and butterflies.
I started by picking the flower background paper that I had gotten from Amber (the owner of Doodles Paper Playground....she sent me all of the things I used on this card today), and the Blue Iridescent Shimmer paper. Then I found the holographic card base and thought it looked really good with what I already chose. Then I cut the two papers and glued them to the card base.
Next, I got out the fairy and butterflies and glued them to the card. It was quick and easy to put this card together because the images were already cut and colored. I chose my Pixie Dust Sparkle Blend and arranged them throughout the card. I layered some of the sequins because I thought it would look really cool like that. I used On Point Glue for the Sparkle Blend. It is really strong and I like that it's clear.
I really like how this card turned out. It's super shiny and pretty. I like how the layered sequins looks with the rest of the card and the Pixie Dust Sparkle Blend has a lot of nice colors in it. You can get this and all of the other Sparkle Blends at the White Rose Crafts shop. You can use my mom's code, "Alison 15" to save 15% off of your purchase. Thank you for reading. Have a nice day!

Thursday, August 22, 2019

Cute Fairy Card

Hi, it's Rhiannon. Today I am sharing this card because I love fairies. I think this is a really cute fairy from A Day for Daisies. Unfortunately, their shop isn't open anymore. I wanted to use the new Grapefruit Sparkle Blend, and I have a set of Distress Markers that matched it perfectly.
I like the Grapefruit Sparkle Blend because I like the colors and the flowers are really cute. There are shades of coral, orange, peach, and white and I like the different sizes.
After I colored the fairy I cut her out and picked out a background. I picked the background because I like it with the fairy. Then I chose the lavender card base and glued on the background.
Next I glued on the fairy. Then I picked out sequins and placed them where I wanted. I really like how the flower sequins looks on the image. After that, I glued the sequins down with On Point Glue from Imagine.
I like how my card ended up. I like how I put the flower sequins on her and the flowers like they are really part of image. You can get all of the Sparkle Blends from White Rose Crafts. Thank you for visiting. Have a nice day!

Friday, July 26, 2019

Icicle Thank You Shaker

Hi, it's Rhiannon. Today I have a "thank you" card that I made for Amber, the owner of Doodles Paper Playground. I made her this card because she sent me a big box of craft items. I used some of the things on this card. Almost everything I used on this card, came from the box.
I started by cutting out a mat for a small card (4" x 5 1/4"). Then I chose a size for my circle to die cut. I used a die from Elizabeth Craft Designs. Before I die cut my card, I blended 4 Scrapberry's Glimmer Inks on my mat. I used Green, Lavender, Teal, and Plum. I used finger daubers to blend the inks. Once I put the colors on, I used Sheer Shimmer Spritz in Sparkle on top of the inks. After I did that. I die cut my circle in the top center. Then, I stamped "thank you" underneath the circle with the Green Shimmer Ink.
Next I made my shaker. I used the "Icicle" Sparkle Blend for inside my shaker. I used it because the colors went really nicely with the rest of my card. The colors in it are white, light blue and silver. I like the diamonds and the big flower pieces in it. Once my shaker was together, I put the mat on to a cream card base. Then, underneath the "thank you," I put a strip of trim that has rhinestones all over it. Amber gave it to me. It shines a lot. After I did that, I put some of the lavender shimmer ink on the edges of my card base.
After I finished with the outside of my card, I added ink to the inside to give it more interest. Once I did the ink, I wrote my message to Amber in silver marker. I like how the Sheer Shimmer Spritz came out on my mat. I think that the "Icicle" Sparkle Blend looks really good with the rest of my card. That's it for today. Have a great day!