Showing posts with label White Rose Crafts DT Projects. Show all posts

Monday, November 19, 2018

Winter Wonder Blog Hop with White Rose Crafts

It’s time for another White Rose Crafts Blog Hop! This month we are celebrating Winter Wonder! We will be creating inspiration projects featuring snowflakes, snowmen, ice, winter critters, skating, sledding and everything else that goes along with this cold and beautiful season. In addition to the incredibly talented WRC design team, we are also very excited to be collaborating with several members of the Doodles Paper Playground team. We invite you to hop along with us, and be sure to leave a comment on every leg of the hop! We will be giving away prizes and offering a Blog Candy Discount Code, so be sure to visit every stop on the hop for more chances to win! Now, go get inspired!


❆⛄❆⛄❆⛄❆⛄

For my project today, I decided to try out one of the new to me and new to White Rose Crafts stamp designers, Little Acres Creations. I decided to go back to one of my favorite techniques & do some stamp masking with the Piles of Smiles stamp set & colored with Spectrum Noir Markers. I added a ton of Sakura White Souffle pen to the colored image, making it look as though there's heavy snowfall, leaving a coating of fluff on all of the cute critters and that adorable mail stump. I added Dovecraft Crystal Clear Glitter Glue to the snow, giving it lots of gorgeous sparkle. I used a white gel pen to liberally add dots of snowfall, all over my design, even over the colored images so they appear in the snow, rather than in front of it. Then I built a custom sentiment using Heffy Doodle's Elfing Christmas Words stamp set, stealing an ampersand from the Your Next Stamp Totally Narly set,  stamping it with Versafine Clair Nocturne ink. As a final touch, I added a few snowflakes from my Doodles Paper Playground Frozen Sparkle Blend, scattered around. 

I selected an ice blue card base from my stash & cut a mat of plaid paper from the Lawn Fawn Perfectly Plaid: Winter paper pack, adhering it with Double Sided Sticky Tape. I trimmed my colored panel to 3.75x5 inches and adhered it in the center, popping it up with Woodware UK 1mm Foam Mounting tape, for a tiny bit of dimension.


I always love to bring the outside of my cards to the inside, so I cut another panel of Perfectly Plaid: Winter paper  and a white panel, measuring 3.5x4.75 inches, layering them with Double Sided Sticky Tape. I again built a custom sentiment, combining the large "Happy Holidays" stamps from Lawn Fawn's Winter Penguin mini stamp set, stamped in Salty Ocean Distress Oxide ink, with "to you and yours" from the Holiday Helpers set using Versafine Clair Morning Mist ink. For a final touch, I added a few Lawn Fawn snowflakes, and the envelope and mailbox from the original Little Acres set, also in Morning Mist.


❆⛄❆⛄❆⛄❆⛄


Prizes: One winner will receive a $15.00 store credit coupon code to White Rose Crafts, and 3 lucky winners will receive a full size package of Frozen Sparkle Blends, sponsored by Doodles Paper Playground!
Blog Candy: Save 15% on every item in the Christmas Shop section of the store through 11:59pm EST, Friday, November 23, 2018 with Coupon Code: JINGLE

⛄❆❅❄⛄❆❅❄⛄❆❅❄

Giveaway Rules:

·            You must be at least 18 to enter. Open Internationally. Winner is responsible for all shipping costs for Gift Code. Shipping for Sparkle Blends prize will be covered by Doodles Paper Playground.
·         Entries must be received no later than 11:59PM EST Friday, November 23, 2018.
Prize will be issued in the form of the form of a one-time use coupon code valued at $15.00. Coupon code is valid at www.WhiteRoseCraftsLLC.com and expires on December 1st, 2018. Coupon code is not valid on shipping & cannot be combined with other coupons or offers.
·         Winner will be drawn on Saturday, November 24th & posted on the White Rose Crafts blog & Facebook page and will be notified by email, if possible.
·         Winner will have 3 days to contact us to claim prize. If prize is not claimed within this time frame, a new winner will be drawn. No Exceptions.
·         This giveaway is not sponsored, affiliated or associated with Facebook any associated entity. All prizes furnished by White Rose Crafts LLC and Doodles Paper Playground.
⛄❆❅❄⛄❆❅❄⛄❆❅❄

The next stop on the hop is: Doodles Paper Playground

⛄❆❅❄⛄❆❅❄⛄❆❅❄

I hope you enjoyed my project & those by all of the other great designers participating in the hop! Don't forget to leave comments on each leg of the hop for lots of entries for a chance to win one of our 4 great prizes!

~~~~~~~~~~~~~~~

Thanks for visiting the blog!
Come back soon,
Happy Crafting!

Friday, November 2, 2018

Design Team Project for White Rose Crafts: 4 Fast Cards, 1 Decoupage Sheet

Hello Doodle Friends!

I'm over on the White Rose Crafts blog today, sharing 4 fast, easy and beautiful cards made with one Craft Creations die cut, Decoupage Sheet, WRC sourced Holiday Paper, and because this week is all about Embracing your Embellishmental Side, a few different Sparkle Blends and some Glitter Glue!

I am smitten with the adorable Busy Penguins from Craft Creations UK, and I love that straight out of the plastic, you have 4 totally cute, dimensional card toppers for just $1.70! Can you say bargain? If you want to stretch this sheet even farther, use the first penguin layers from each topper as flat images on 4 additional cards, or use all of them on one to create a cute, interactive scene with all 4 of these cuties! I, of course, didn't realize this was a possibility until I'd already completed all 4 of my cards, but I love that there is potential to get 8 cards out of this one sheet! WOW! That's some amazing value!


These sweet little guys went together so quick and easy--I think it took me 15 minutes to assemble all 4 toppers! I wanted to keep my cards lower profile, so I decided to use the Woodware UK 1mm Foam Mounting Tape to layer up all 4 of the toppers. I love that I still get dimension without adding a ton of extra postage when I mail these cuties out for Christmas. 


I selected 4 sheets of paper from my extensive Holiday paper collection, trying to match them to the scarves of each penguin. I chose the green holly pattern and aqua snowflakes  from Wild Rose Studio's Holly Lane and Frosted Lace paper packs, respectively. The red and green snowflakes are from the Echo Park I Love Christmas paper pack, and the ornaments and script on black background are from the Be Merry and Bright 6x6 pack by Couture Creations


I cut four 5 1/2 x 5 1/2 inch, 110#, white card bases and trimmed my background papers to 5 1/4 x 5 1/4 inches. I mounted the backgrounds using 6mm Double Sided Sticky Tape, centered on my square card bases. 


Next, I added the same Double Sided Tape to the back of the assembled toppers and adhered them on the backgrounds at an angle, for a bit of interest.


Using Stazon black ink, I stamped a different sentiment from the Heffy Doodle Elfing Christmas Words stamp set on each card. I love how versatile this set is, because you can mix and match all the different parts to build just the sentiment you need for your card!


Since this week is all about embellishments, I decided to double up on the sparkle! I chose Dovecraft glitter glue in Crystal , using it to go over the framed outline of each of the topper squares and over the scarves on each of the penguins--which added an awesome shimmer.

As a final touch, I selected 3 different Sparkle Blends from the Doodles Paper PlaygroundOctober Release to embellish my cards. I used Frozen on the holly and aqua snowflakes versions, Candy Cane on the green and red snowflakes and Vixen on the final, non-traditionally colored card. I adhered them in clusters of three, in three areas that created an eye pleasing, visual triangle.


I hope you've enjoyed my collection of cards, today! These were so fast to put together--approximately half an hour from start to finish! That's not bad at all for 4 really cute cards--especially in the midst of the Holiday crafting flurry!

~~~~~~~~~~~~~~~~

Thanks for visiting the blog!
Come back soon,
Happy Crafting!

Friday, July 27, 2018

Candy Machine Shaker Favor Cards: DT project for White Rose Crafts

Good afternoon! I've got a set of Candy Machine Shaker Favor Cards to share with you today that I created as my design team project for White Rose Crafts.


I started with a pack of Jillibean Soup Small Circle Shaker Cards and matching Shaker Pouches, the Jillibean Soup Sweet Treat stamp set & a selection of Distress Oxide Inks in Candied AppleWilted VioletSalty OceanSpiced MarmaladePicked Raspberry & Mowed Lawn. I stamped the candy machine base and top around the shaker card openings in each of the Oxide colors. You'll notice how I never show the card I created in Candied Apple again...well, that's because I smudged it beyond recognition right after I took the next photo. Oops. We won't dwell on that now. Sigh.


Next I colored in parts of the candy machine base images using my Kelly Creates Metallic Jewel Brush Pens, to give them a little shine. I stamped the "Sweet Treat For You!" sentiment using Versafine Clair Medieval Blue ink. Clair inks have been my favorite for sentiments lately because, being a pigment ink, they produce beautiful, crisp impressions every time, even with acrylic stamps (like those from  Jillibean Soup), and they dry much faster than other pigment inks. 


Next, I selected some geometric and plaid patterned papers that I thought coordinated well with the images & cut out 2 panels of each, measuring 4x5.25 inches, plus a strip measuring .5-.75x3.75 inches. I adhered the skinny strips beneath the candy machines, to ground them. Then I adhered one the 4x5.25 inch panels, centered inside each of the cards, and layered them with a panel of white cardstock, measuring 3.5x4.75 inches. I took the second panel of coordinating patterned paper and temporarily adhered it to the back of the cover of my card using washi tape. I lightly traced my shaker opening with a pencil & removed the paper from my card. Next I used a Tear Strip die from my stash and some partial die cutting to cut a short tear strip on each of the panels inside the pencil circle. 


I added double sided tape to the patterned side of the paper, being careful to avoid my pencil circle. Once my tape was applied I erased my pencil circles. Then, I took the Jillibean Soup Small Circle PVC Shakers and popped them through the shaker card openings & filled them with chocolate candies, before adhering my patterned panels of paper to the back, securing the shaker pouch and candy in place, and making sure the tear strip was behind the pouch so my recipient has easy access to their sweet treat!


I hope you enjoyed these cards. You'll notice I promptly forgot to take any more process photos after the first one (that I smudged the card), because I got frustrated--but I'll try to do better next time.

Additional Supplies:


~~~~~~~~~~~~~~~

Thanks for visiting the blog!
Come back soon,
Happy Crafting!

Saturday, July 21, 2018

Four Kaisercraft Fairy Dust Collection Shaker Cards, created for White Rose Crafts Design Team

4 Kaisercraft Fairy Dust Collection Shaker Cards

Today I would like to share four cards I created as part of my design team projects for White Rose Crafts using the beautiful Kaisercraft Fairy Dust paper collection, combined with three of my June Release Sparkle Blends

All of our limited edition Sparkle Blends are available for purchase, exclusively, in the White Rose Crafts online store, while supplies last.

~~~~~~~~~~~~~~~

For my First project, I chose a 4x6 panel from the Stardust cut apart sheet. I used my kraft knife to cut out the center of the oval design, mounting it in the center of a landscape, white A2 card. I cut a piece of acetate transparency and mounted it on the back of the frame panel. I selected the Lilac Luster Sparkle Blends and placed a generous amount to the center of the decorative oval & used 3mm Woodware Mounting Tape to pop up the panel & attach it to my card base. For a final touch, I cut out one of the sentiment banners and fussy cut a butterfly from the foiled Flutter cardstock and adhered them in opposite corners, before adding some Dovecraft Crystal Glitter Glue. On the inside, I trimmed down one of the cut apart sentiments from the Fairy Wishes cut apart sheet.


On the inside, I trimmed down one of the cut apart sentiments from the Fairy Wishes cut apart sheet.


~~~~~~~~~~~~~~~

For my second card, I selected another of the sentiment panels from the Fairy Wishes cut apart sheet, and used my craft knife to cut out the bracket panel in the center, carefully cutting around the fairy image. I mounted a 4 7/8x4 7/8 panel of the reverse side of the Sparkly paper, and placed a generous amount of Fairy Dust sparkle blends in the center. I added acetate to the back of my front panel and popped it up using 3mm foam tape. I cut out and mounted a sentiment banner, and one of the flowers from the Enchanted paper and mounted them using 1mm foam tape. 


On the inside, I added a panel of white cardstock, and cut apart the sentiment I'd cut out of the center of the panel on the front. Finally, I added a fairy I fussy cut from the foiled Flutter cardstock and mounted it on the left of the sentiment to cover up the notches where the fairy had been cut out.


~~~~~~~~~~~~~~~

For my third card, I chose another of the panels from the Fairy Wishes cut apart sheet & fussy cut the bracket portion. I used my kraft knife to cut out the center rectangle with the fairy image, and mounted it on the center of a top folding, landscape A2 card base. I placed a generous amount of Peacock Pizzazz Sparkle Blends in the center of the panel. Then I adhered a panel of acetate to the back of the frame and mounted it over the sequins with 3mm foam tape. I cut one of the banner strips from the edge of the paper, mounted it on purple cardstock and adhered it to the bottom of the shaker, using 1mm foam tape. I fussy cut 4 butterflies and adhered them in the corners, with their wings popped up. Finally, I added glitter glue for sparkle.


On the inside, I cut apart another of the sentiment banners from the barcode edge of a sheet of paper, trimming it into three lines, short enough to fit inside the card, and mounted them on a scrap of the patterned paper and then a piece of teal cardstock. I mounted that whole thing on a panel of lavender cardstock, edged at the top and bottom with thin scraps of another pattern. I added the whole panel to the inside of my card and embellished it with more fussy cut butterflies.


~~~~~~~~~~~~~~~

For my final card of the day, I selected one more of the panels from the  Fairy Wishes cut apart sheet and fussy cut the scalloped circle. I used a circle die from my stash to cut out the sentiment in the middle, and set it aside. I cut a 5.25 inch square panel of the Flutterby paper and adhered it to a pale aqua 5.5 inch card base. I added a circle of acetate to the back of the scalloped frame, and used a double layer of Fun Foam to create my shaker box, using two dies from my stash. I added a generous amount of the Fairy Dust Sparkle Blends to the center of the panel, and added my frame. I trimmed down one of the sentiments from the bar code edge of the paper and adhered it at the top of the shaker. Above that, I adhered a crown image, fussy cut from the foiled Flutter paper, as well as a few butterflies and one of the fairies. I added Glitter Glue to the fairy and butterfly wings, and used Sea Breeze Nuvo Jewel Drops on the crown as jewels.


To finish the inside of my card, I took the center I had cut out of the frame I used for the shaker and adhered one of the fussy cut crowns to the top, and a little butterfly as embellishments.


~~~~~~~~~~~~~~~

I hope you've enjoyed my cards today. You can check out the rest of the cards I created with this paper collection over on the White Rose Crafts Blog!

~~~~~~~~~~~~~~~

Thanks for visiting the blog!
Come back soon,
Happy Crafting!

Friday, July 13, 2018

A Very Wild Rose Christmas in July: DT project for White Rose Crafts

Hello Doodle friends, its time for some Wild Rose Studio inspiration!  I decided to get a jump start on my Christmas cards, with a little Christmas in July, WRS style and created using some adorable stamps and pretty Christmas papers from Wild Rose Studio


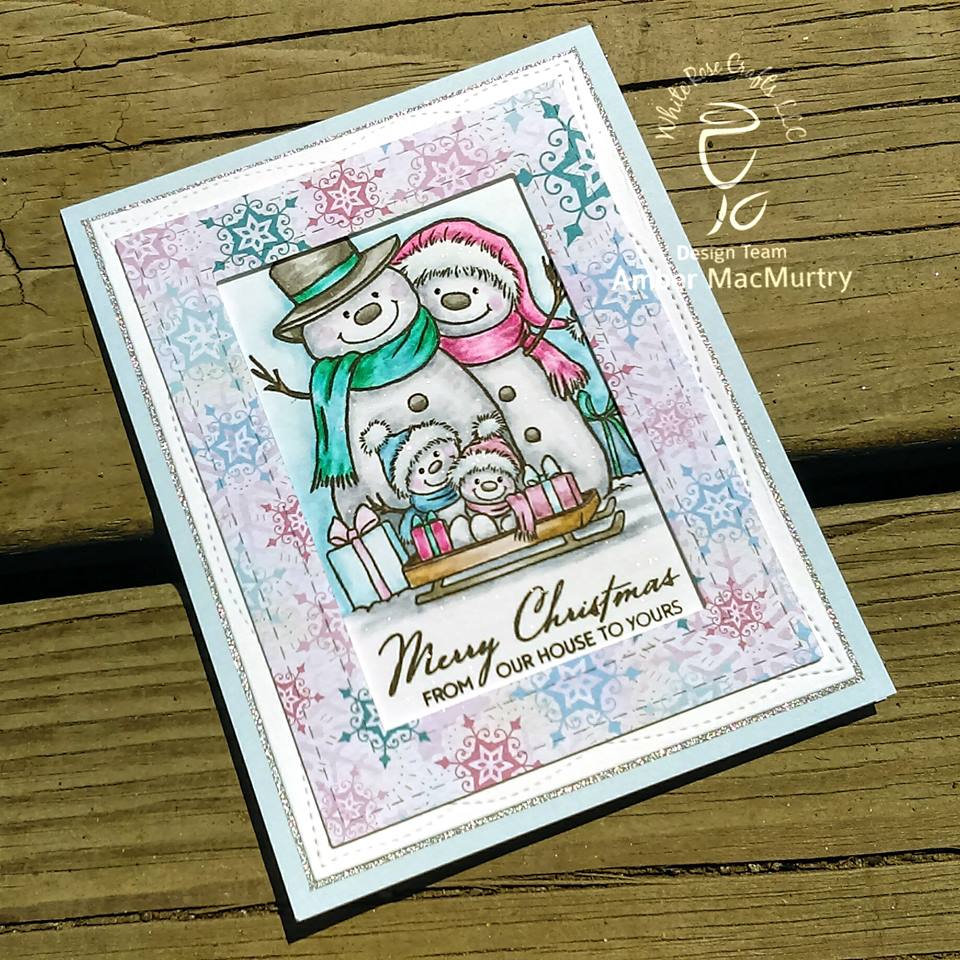
For my first card, I chose the Snowman Family stamp set and a sheet of pretty snowflake paper in non-traditional colors from the Frosted Lace paper pack. I stamped the images with Versafine Onyx Black ink on Bristol Smooth cardstock and colored them with a combination of Arteza real brush pens and Distress Markers.


For my second card, I selected the Christmas Bunny stamp and a beautiful poinsettia printed paper from the gorgeous Festive Florals paper pack. I colored this cute little guy with Arteza real brush pens and embellished my card with Nuvo drops in Red Berry and Dovecraft Crystal glitter glue.


For my final card, I had to use the squeal worthy Mouse on Bauble stamp on a sheet of stunning blue poinsettia paper, also from the Festive Florals paper pack. 


I hope you enjoyed my cards today as much as I loved making them! I adore these products, so so much!

~~~~~~~~~~~~~~~

Thanks for visiting the blog!
Come back soon,
Happy Crafting!

Sunday, February 4, 2018

"Beary Big Heart" Shaker Card for White Rose Crafts-featuring "Love Potion" Sparkle Blends

Hello Doodle Friends!

Today I am sharing this pretty shaker card Valentine I created as my White Rose Crafts design team project for this week using Heffy Doodle Beary Big Heart stamp set and Doodles Paper Playground: Sparkle Blends Love Potion, available in the White Rose Crafts online store. You can find links to the products I used at the end of the post. I also entered this card in the ModSquadChallenge.com Love themed challenge.

I started with a top folding, A2 size card base created with110# white cardstock & an old 5x5 heart stencil from my stash. Using a Ranger mini blending tool, with Distress Oxides in Candied ApplePicked Raspberry & Worn Lipstick, I blended from the center of the stencil in a circular ombre pattern.


Wednesday, January 31, 2018

Wild Rose Studio "Bunny with Butterfly" for White Rose Crafts

Hello Doodle Friends!

Tonight I'm sharing a Simple card I created with this absolutely adorable Stamp, Bunny With Butterfly and a sheet of gorgeous floral patterned paper from the Bella Paper Pack, both from Wild Rose Studio for the White Rose Crafts Design Team.


Sunday, January 14, 2018

Dimensional Aperture card featuring Your Next Stamp "Cute Gnomies"

Hello Doodle Friends!

For my White Rose Crafts design team project this week, I created a dimensional aperture card, featuring  the absolutely adorable Your Next Stamp "Cute Gnomies" stamp set and Doodles Paper Playground: Sparkle Blends "Love Potion" embellishment mix.


I started with an A2 panel of wood grain printed kraft cardstock from my stash, and 1", 1.5" & 2" circle punches to create my apertures in an eye pleasing triangular design. I then placed my punched panel over a 4 1/8" x 5 3/8" panel of white Recollections 65# cardstock.  I used a pencil to lightly trace the circles, before stamping the three Gnome images using Memento Tuxedo Black ink. I also stamped the flower cluster image from the set on the front of the wood grain panel. Next, I set about coloring the aperture images using my Spectrum Noir markers, and the wood grain image with Prismacolor Colored Pencils.


Thursday, December 7, 2017

Holiday Card Series Day 2: Lawn Fawn-Winter Bunny (a design team project for White Rose Crafts)

Hello Doodle Friends,

Today I am sharing Day 2 of my Holiday Card Series--which also happens to be my Design team project of the week for White Rose Crafts! I created two cards this time, featuring the same image and sentiment. I was able to achieve a slightly different look by switching up the pattern paper I chose.

I started by stamping this adorable "Winter Bunny" by Lawn Fawn at either end of a piece of Recollections 65#, white cardstock that was 4 inches x 5.25 inches, using my Original Misti stamp positioning tool. Using the Misti, I was able to leave the stamp on the door and just rotate my paper 180 degrees to ensure the bunny was in the same position at both ends. 

Saturday, November 18, 2017

Holiday Card Series Day 3: Heffy Doodle-Elfish Antics (Design Team Project for White Rose Crafts)

Hello Doodle Friends,

Tonight I am sharing a pair of super cute cards I created with one background I created using a variety of the supporting image stamps from Heffy Doodle's absolutely adorable Elfish Antics stamp set from the November 1st 2017 release, available to purchase now in the White Rose Crafts store.

Who doesn't love a 2 for 1 deal? Amiright?

I knew I wanted to do some coloring on Recollections kraft cardstock using my Spectrum Noir Colored Pencils-Primaries set, so I decided to use the small, supporting images included in the stamp set and create a random pattern on my kraft panel. I used Versafine ink in Vintage Sepia and my Misti stamping tool to ensure that I got crisp clear images with a softer, tone on tone look on the kraft background. I also stamped each of the elves and one of the candy canes on a separate piece of kraft paper. Then I used traditional Christmas colors to add some very simple coloring on all of the images. I used colored pencils to lay down a base on the elves and extra candy cane before using Sakura Glaze pens in White, Red, Green and Yellow to help make the colors pop. Finally I fussy cut the images leaving a bit of a kraft border.

I trimmed my panel by 1/8 inch on each side and chose a deep red Neenah cardstock cut to 4 1/8x5 3/8" to mat my background on. I then used the second largest oval die from my Darice Embossing Essentials nested oval dies to cut a window in the center of my colored panel. I adhered my panel to the red layer and tried layering my elves inside the window, but they blended into the red more than I liked, so I used the largest Darice oval die to cut a piece of vellum to layer on top. I liked that it overlapped the kraft panel a bit. I took a piece of the kraft card and used my Versamark ink pad and Recollections Snow white embossing powder to heat emboss the cute and punny sentiment and trimmed it down. I felt it blended into the background a bit too much, so I inked the edges of the banner with Versamark and heat embossed them with the same white powder. I used double sided tear tape from White Rose Crafts to layer the adorable girl elf on top of the vellum oval, after deciding that both elves made the design too busy, and used foam tape to pop sentiment banner on top. I used 1mm foam tape on the back of the vellum, hidden behind the elf and sentiment, and adhered it in the center of the red window. I mounted the panel on a top folding US A2, portrait card base made using Recollections 110# White Cardstock, leaving a tiny white border around the edge. I felt the card needed just a little bit more definition, so I used my White Sakura Gelly Roll pen to draw faux stitch lines around the stamped kraft panel and a double stitch line around the edge of the vellum oval, to look like a stitched seam. For the final touch, I added a double coat of Spectrum Noir Clear Overlay Sparkle Pen to the sentiment banner.