Showing posts with label Oh Christmas Tree. Show all posts

Friday, January 22, 2021

Giant Sequin Rainbow


Hey everyone!  It's EK.  Did you know that little girls like rainbows? I mean really like rainbows...and they don't have to be so little to love them. Today I am finally placating my 12 year old daughter and creating this giant (and yes I mean 8x10 giant) rainbow on wood panel for my rainbow obsessed kiddo.

To create this giant rainbow, I pulled seven (plus one) packages of Sparkle Blends sequins from Doodle's Paper Playground.

Now I will warn you, I tried to cut a corner on this project, so it didn't turn out how I had hoped or planned, but my kid loves it and I thought it was still worth sharing despite my personal disappointment in it.

I started with an old already painted wood panel. This was painted up for another project that I just never got around to. But I really thought all of these blues and teals would make the perfect background for a rainbow.

Using a water soluble white pencil, I sketched a rainbow onto the panel.

Using some craft glue, I added the 'violet layer' using the Rosey Gold Sparkle Blend.

The 'indigo' layer got a layer of With A Bang Sparkle Blends.

For the 'blue' section, I added Baby Shark Sparkle Blends, and Oh Christmas Tree for the 'green' section.

I pulled out the Birthstone Collection Citrine Sparkle Blends for the 'yellow' row and Candy Corn for the 'orange'.

Finally I adhered Ladybird Sparkle Blends for the 'red' row.

At the bottom of each rainbow I added a rainbow I sketched in a cloud using my water soluble pencil.
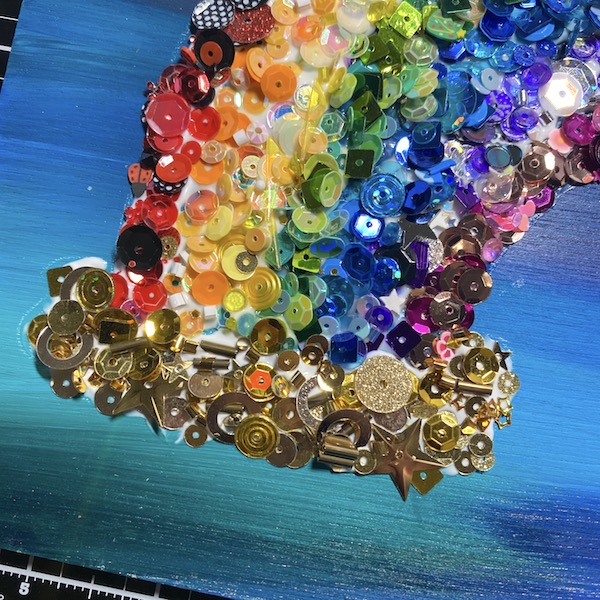
I filled the clouds with Gold Rush Sparkle Blends.

Here is where I messed my project up. Instead of using Golden Clear Tar to coat the sequins, a product that would have dried clear and shinny, I used some Liquitex Matte Medium. I used it all the time on art journals and mixed media projects and it always dries clear. However, I don't used it this thickly, and come to find out when it is thick, it dries cloudy.

Despite the cloudiness, I still think there is something really special about this project. And more importantly, my rainbow loving 12 year old things it is perfect.

White the project may not be perfect, I hope it makes you think about using your sequins in unique ways.

Oh, and if you want to save 10% on your order feel free to use the code EKGORMAN10. 

Sunday, July 19, 2020

Still Christmas In July

Hey Sparkle Blends Fans! Judy here! Today I am sharing another fun and sparkly Christmas In July project with you!

Check this out. This project uses an older cover plate die from Queen and Company that cuts out a basic Christmas Tree. I put some seriously sparkly silver glitter paper behind it, and some green glitter on top. And then in all my shaker spots I used Sparkle Blends Merry Mint. I also added the star on top of the tree with a gold star from the Oh Christmas Tree Sparkle Blend. I then finished up with stamping a sentiment from an older Stamps Of Life Stamp Set called Santa2Stamp with Memento Tuxedo Black Ink onto some plain white cardstock and trimmed it down to fit at the bottom of my card.

To see more of the Sparkle Blends July Release as well as all of the amazing Sparkle Blends, head over to the Sparkle Blends Shop. And, take a look on the Doodles Paper Playground blog, Facebook page and in the Sparkle Blends Fan Club on Facebook to see all the fun things going on!


I do hope you enjoy this project and can't wait to see what you create!
Hugs!

Judy

Saturday, July 11, 2020

Surprise Gift Shaker Card


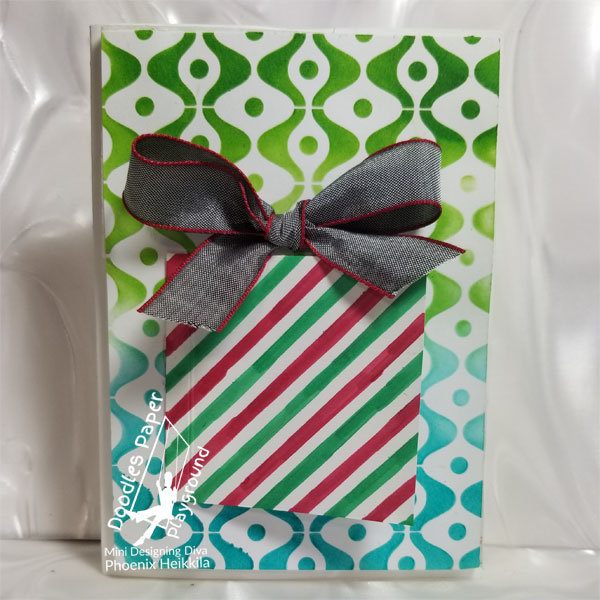
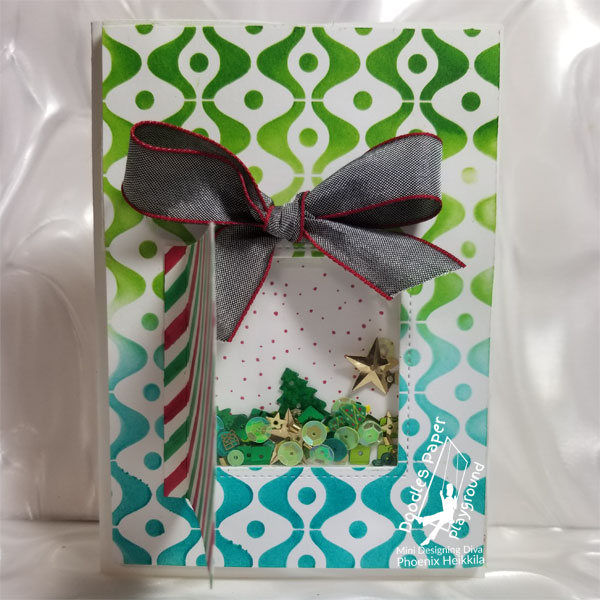
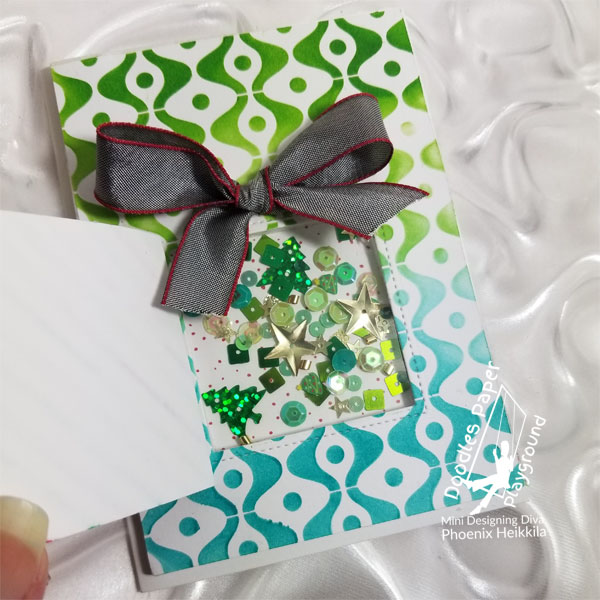
Hi, it's Phoenix. Today I am going to be showing you my Surprise Gift Shaker card using the "Oh Christmas Tree" Sparkle Blend from Doodles Paper Playground. I wanted to do something more interactive than just a shaker, so I decided to make the gift box "open" up.
This image has an empty alt attribute; its file name is Gift-Shaker-2-600-1.jpg
I started off by using Mowed Lawn and Peacock Feathers Distress ink on an old Dreamweaver stencil. I applied the ink with a Cotton Tail Blending Brush from The Rabbit Hole Designs. Next, I die cut a square on to the stenciled background. After that, I glued on a piece of acetate, using Zip Dry Glue. While it was drying, I decided that I wanted to use the "Oh Christmas Tree" Sparkle Blend, which helped me pick out everything else.
This image has an empty alt attribute; its file name is Gift-Shaker-4-600.jpg
I cut out a rectangle that was slightly bigger than my shaker window, and I used the Diagonal Stripe stencil from Simon Says Stamp on it with Copic Markers. The Copics stain the stencil, but I used Isopropyl Alcohol to clean it up. To make the flap on the side, I used a scoring tool 1/4" in from the left side. Then I attached it to the front of the card.
I added foam tape to the back, and filled the shaker window with the Sparkle Blend. I added a piece of paper that had some little red dots to close off the window. Next, I chose my ribbon, had Mom tie it into a bow, and I attached it with Zip Dry Glue. Then I added it all to the card base.
This image has an empty alt attribute; its file name is Gift-Shaker-3-600.jpg
I made this card much faster than I usually make cards, and I think it's really cool. I think that next time, I will add another piece of acetate on the inside, so that it becomes a see-through shaker. I hope you give this Surprise Shaker a try! Have a nice day!