Showing posts with label Christmas. Show all posts

Thursday, December 17, 2020

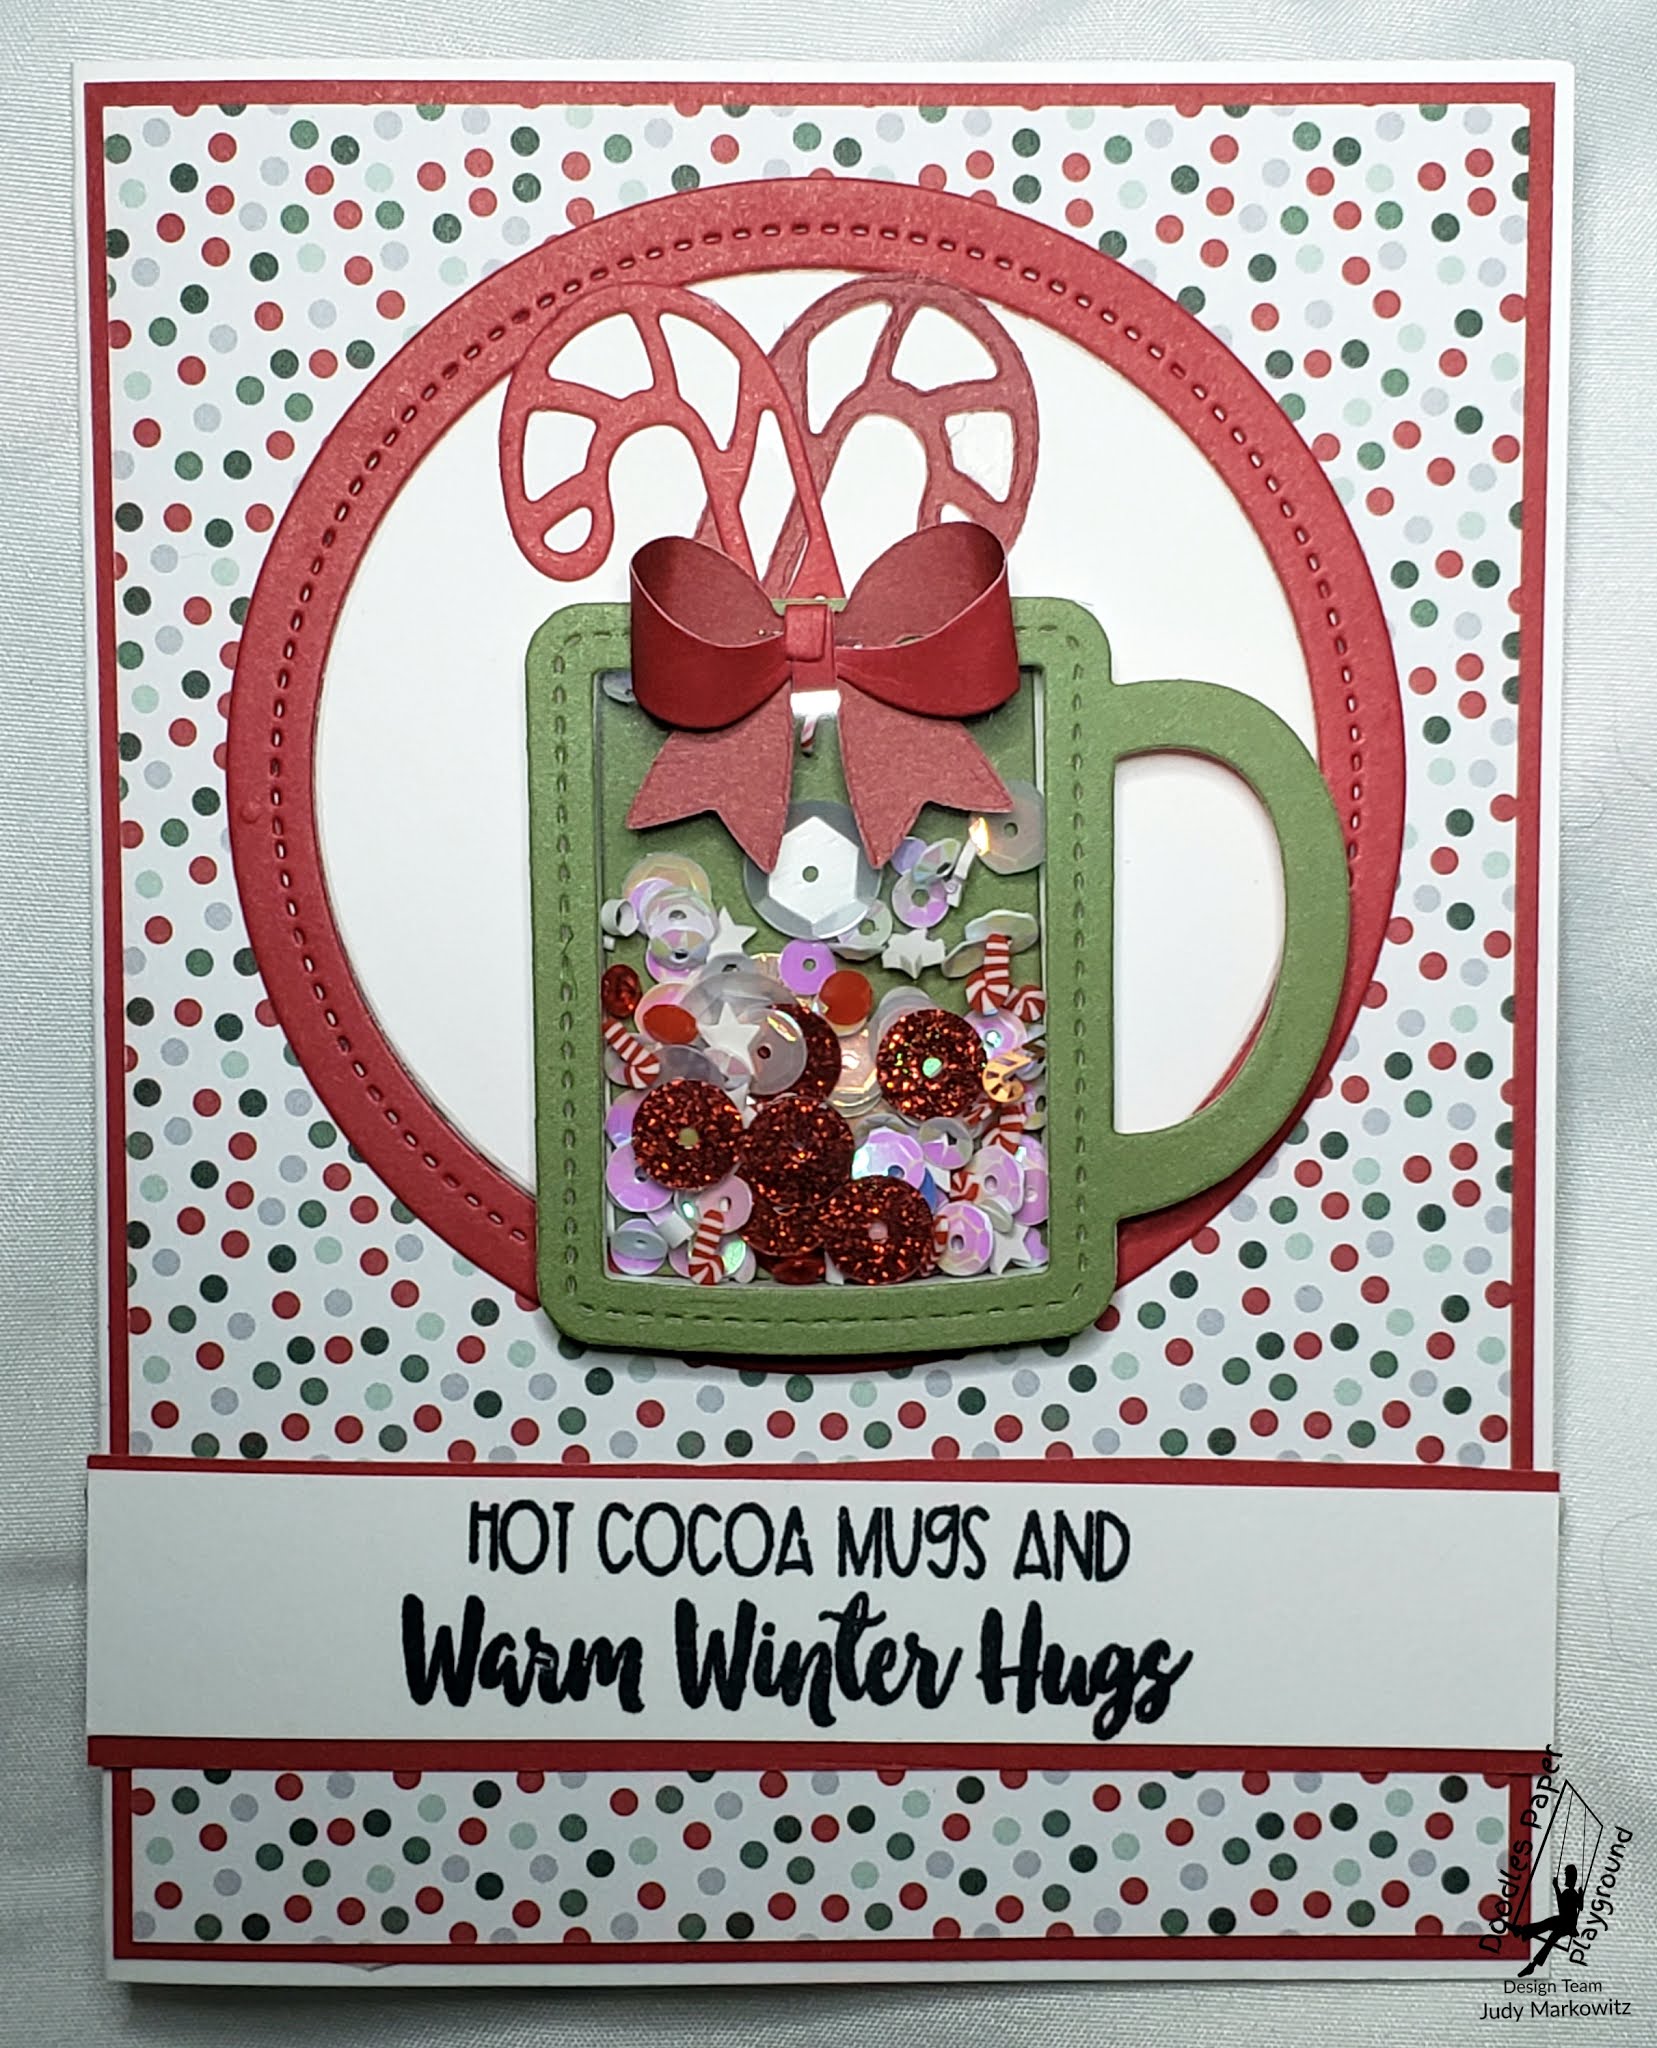
Hot Cocoa Mugs And Warm Winter Hugs

How is the weather where you are? For me it is definitely a Hot Cocoa kind of day! Take a look! 

For today's project I have used Papers, shaker shape and dies from Queen and Company's Heartfelt Holiday Kit nd combined these pieces with Sparkle Blends Minter Is Coming Sequin Mix. This mix could not be more perfect for this project if it tried!

So head over to the Sparkle Blends Shop. Grab your favorites while they are still available! And as always, take a look on the Doodles Paper Playground blogFacebook page and in the Sparkle Blends Fan Club on Facebook to see all the fun things going on!

I do hope you enjoy this project and can't wait to see what you create!

Hugs!
Judy

Sunday, October 18, 2020

Gingerbread House

Hi, it's Phoenix. Today I am going to show you my Gingerbread House card that uses the new Frosted Gingerbread Sparkle Blend from Doodles Paper Playground. I really like the Lawn Fawn Build A House die set with the Gingerbread Add-On, so I knew I wanted to use it with Frosted Gingerbread.

I started out by die cutting the different pieces of the house with brown cardstock, and the details were done with white cardstock. I used Snap & Peel on the small parts, like the piping, which is a double sided adhesive sheet. This makes it a lot easier to adhere the small things to the house. After that, I glued the Sparkle Blends to the house using On Point Glue from Imagine. One thing that I really like about the Frosted Gingerbread Sparkle Blend is the small peppermints. I used one for my door handle.

Next, I cut out the white snowy hill behind the house and the gray wintry sky for a mat. I glued these two pieces together and then stuck the house on top of it. I thought that the hill needed some additional decorating, so I cut out a sign from brown cardstock, die cut another roof from the Gingerbread Add On set in white, and added it to the sign for snow. I decided to use the Season's Greetings stamp from the Reveal Wheel Holiday Sentiments. The sky was a little plain so I stamped the swirls from the Winter Dragon Lawn Fawn set with Pumice Stone Distress Ink.

I didn't use a lot of the parts of the Sparkle Blend, but it has really cute Gingerbread Men and frosted cupcakes. I decided to keep my house a little simple though, so I only used some of the plain brown sequins. I hope you like this card. Have you seen the entire new release of Sparkle Blends yet? Head over to the Sparkle Blends Shop on Etsy to check them out. Have a nice day!


Saturday, October 10, 2020

Christmas Wishes From Our Home To Yours

Are you all loving this new release!!!! Check this out. I used Minter Is Coming and Frosted Gingerbread Sparkle Blends on my card. I adore all the amazing elements in these two blends and did two different shakers for this but then did use some elements from both blends as I added extra detail on my card.


I used papers and foam shapes and dies from Queen and Company North Pole Kit as well as some red glitter paper and white cardstock that I ink blended with Speckled Egg Distress Oxide Ink. Queen and Company and Sparkle Blends make for a perfect afternoon! You can see details of all the fun elements in these pics.


So head over to the Sparkle Blends Shop. Grab your favorites from the new release. And maybe grab them all while they are still available! There is even an October Bundle! And, take a look on the Doodles Paper Playground blogFacebook page and in the Sparkle Blends Fan Club on Facebook to see all the fun things going on!

I do hope you enjoy this project and can't wait to see what you create!

Hugs!
Judy


Thursday, October 8, 2020

Holly Berry Shaker

Hello! Alison here. Today I have a card that features one of the newest Sparkle Blends, called Holly Berry. The new release from Doodles Paper Playground has Sparkle Blends for anyone's style for the upcoming holiday season.

For this card, I thought it would be fun to use a frame die as my shaker with an alcohol ink background. I chose the Holly Vine Frame die from Poppy Stamps, and i die cut it out of white cardstock 4 times to build my shaker. I chose an alcohol ink background I had made that uses the Gilded Alloy and I believe Cranberry alcohol ink from Ranger. I made it quite a while ago, so I'm not positive it's Cranberry.
You can see in the photo above how pretty the Holly Berry Sparkle Blend is. I love the gigantic holly leaves that are in there (I opted to cut them in half for this card), the glittery red sequins, and all the pretty confetti sequins too. The Sparkle Blend pops against the background. I added some pretty patterned paper behind the alcohol ink background, added a small sentiment, and I mounted it all on to a white card base.


This is such a pretty card, and it's quick to recreate. You can make several alcohol ink backgrounds at once, die cut plenty of frames in one sitting, and just put everything together assembly line style. But as simple as it is, I think that the varying layers have quite an impact. Have you seen the entire new release of Sparkle Blends yet? Head over to the Sparkle Blends Shop on Etsy to check them out. Thanks so much for stopping by. Have an inspiring day!


Monday, October 5, 2020

Are You Ready For The New Sparkle Blend Release!!!!!

 Are you all as excited as I am for this new release!!!! Check these out. My daughter Ally and I got to spend some Mother Daughter Sparkly Crafting Time. And I have to share these with you all.

So up first, I am using Silver Bells Sparkle Blend in the super sparkly holiday card. And to mix it up a bit I made the bow in this fabulous lavender textured paper just to be a tad untraditional. I really love how this came out and this blend is absolutely gorgeous!


And check out what Ally came up with! She is using Holly Berry, Minter Is Coming and Silver Bells Sparkle Blends on her card. I adore all the amazing elements she used on her card! How fabulous is this!


So head over to the Sparkle Blends Shop. Grab your favorites from the new release. Ok, they are ALL fabulous so maybe grab them all while they are still available! And, take a look on the Doodles Paper Playground blogFacebook page and in the Sparkle Blends Fan Club on Facebook to see all the fun things going on!

We do hope you enjoy these projects and can't wait to see what you create!

Hugs!
Judy and Ally

Thursday, July 23, 2020

Ho. Ho. Ho

Hi Sparkle Blends Fans! Today I am bringing you some more Christmas in July cheer featuring the big guy in all his sparkly jollyness! And I am using the perfect blend! His very own specialty blend, Old St. Nick! Have a look!
For this project I used a stamp and die set that is one of my favorites from The Stamps of Life and it is called Santa2Stamp and Santa Dies. I used the matching die set to create the shaker opening rather than using it to paper piece his hat. I added a layer of acetate behind and foam tape to create my shaker pocket.
To make my santa super textured, I colored him up with Copics, but then added texture to his mustache and beard with a Snow Marker from Marvy Uchida.
This is the first time I have used this. You add the marker where you want the texture and then hit it with your heat gun and it poofs up! So totally fun! Then I added Stickles Glitter Gel in Moon Dust to the brim and the poof of his hat. I am totally loving how this all came together.
To see more of the Sparkle Blends July Release as well as all of the amazing Sparkle Blends, head over to the Sparkle Blends Shop. And, take a look on the Doodles Paper Playground blog, Facebook page and in the Sparkle Blends Fan Club on Facebook to see all the fun things going on!
I do hope you enjoy this project and can't wait to see what you create!

Hugs!
Judy

Sunday, July 19, 2020

Still Christmas In July

Hey Sparkle Blends Fans! Judy here! Today I am sharing another fun and sparkly Christmas In July project with you!

Check this out. This project uses an older cover plate die from Queen and Company that cuts out a basic Christmas Tree. I put some seriously sparkly silver glitter paper behind it, and some green glitter on top. And then in all my shaker spots I used Sparkle Blends Merry Mint. I also added the star on top of the tree with a gold star from the Oh Christmas Tree Sparkle Blend. I then finished up with stamping a sentiment from an older Stamps Of Life Stamp Set called Santa2Stamp with Memento Tuxedo Black Ink onto some plain white cardstock and trimmed it down to fit at the bottom of my card.

To see more of the Sparkle Blends July Release as well as all of the amazing Sparkle Blends, head over to the Sparkle Blends Shop. And, take a look on the Doodles Paper Playground blogFacebook page and in the Sparkle Blends Fan Club on Facebook to see all the fun things going on!


I do hope you enjoy this project and can't wait to see what you create!
Hugs!

Judy

Saturday, July 11, 2020

Surprise Gift Shaker Card


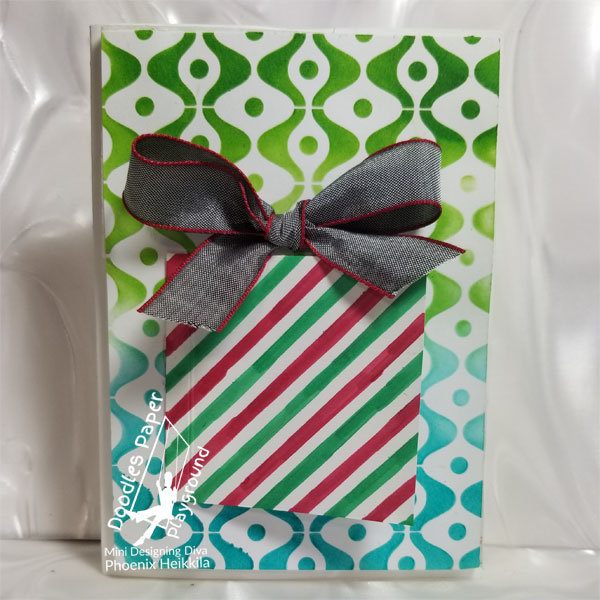
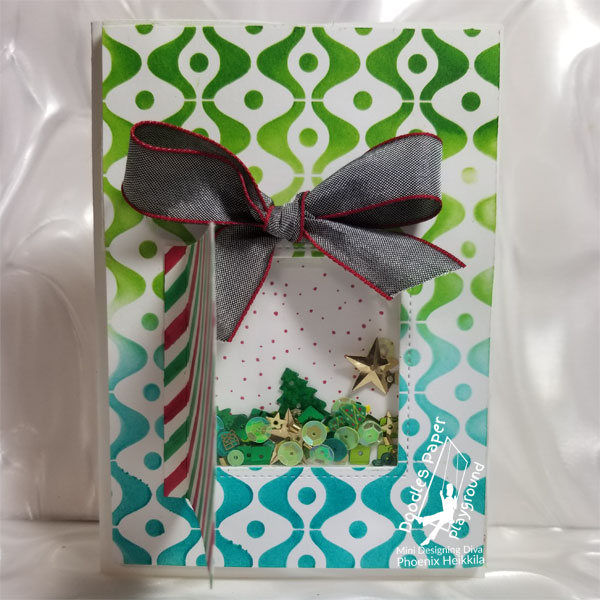
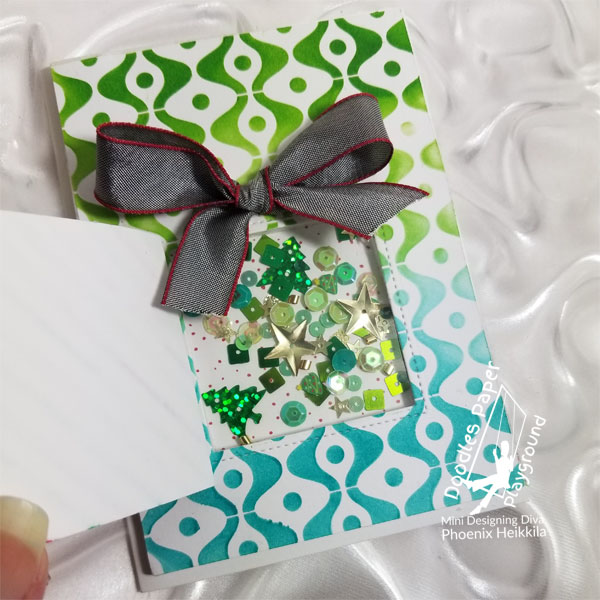
Hi, it's Phoenix. Today I am going to be showing you my Surprise Gift Shaker card using the "Oh Christmas Tree" Sparkle Blend from Doodles Paper Playground. I wanted to do something more interactive than just a shaker, so I decided to make the gift box "open" up.
This image has an empty alt attribute; its file name is Gift-Shaker-2-600-1.jpg
I started off by using Mowed Lawn and Peacock Feathers Distress ink on an old Dreamweaver stencil. I applied the ink with a Cotton Tail Blending Brush from The Rabbit Hole Designs. Next, I die cut a square on to the stenciled background. After that, I glued on a piece of acetate, using Zip Dry Glue. While it was drying, I decided that I wanted to use the "Oh Christmas Tree" Sparkle Blend, which helped me pick out everything else.
This image has an empty alt attribute; its file name is Gift-Shaker-4-600.jpg
I cut out a rectangle that was slightly bigger than my shaker window, and I used the Diagonal Stripe stencil from Simon Says Stamp on it with Copic Markers. The Copics stain the stencil, but I used Isopropyl Alcohol to clean it up. To make the flap on the side, I used a scoring tool 1/4" in from the left side. Then I attached it to the front of the card.
I added foam tape to the back, and filled the shaker window with the Sparkle Blend. I added a piece of paper that had some little red dots to close off the window. Next, I chose my ribbon, had Mom tie it into a bow, and I attached it with Zip Dry Glue. Then I added it all to the card base.
This image has an empty alt attribute; its file name is Gift-Shaker-3-600.jpg
I made this card much faster than I usually make cards, and I think it's really cool. I think that next time, I will add another piece of acetate on the inside, so that it becomes a see-through shaker. I hope you give this Surprise Shaker a try! Have a nice day!

Sunday, December 22, 2019

Season's Greeting No Frame Shaker Card

Hello Crafty Friends -Annie here with a fun shaker card. 

This is a no frame shaker card featuring 
 A soft palate of pink, grey, white and black & white sequins of every texture &
 finish, combined with transparent pink ice crystals and 
a healthy mix of penguin-shaped Fimo slices.


Materials Used:
My Minds Eye Brand: Oh What Fun Pattern Paper (Black dot and Pink Snowflake)
White Rose Designs Brand Pattern Paper: Pale Pink and Multi-Color Striped)
Inks:
Tsukeniko: Memento Tuxedo Black
Tsukeniko: Memento Dew Drop: London Fog
Tsukeniko: Memento Dew Drop: Potter 's Clay
Tsukeniko: Memento Dew Drop: Rose Bud
Tsukeniko: Memento Dew Drop: Paris Dusk
Tsukeniko: Versafine Onyx Black
Tsukeniko: StazOn: Jet Black
Stamps:
Papercraft: Christmas Characters
Maker's Movement: Christmas is Best with You (sentiment)
Adhesives:
Ranger Glossy Accents
Imagine Crafts: On Point Glue
Imagine Crafts: Tear It Tape
Other:
Sakura Gelly Roll Pens: White and Black
Clear Packaging
Recollections Brand 110lb Cardstock: White (card base)

Thank you for stopping by the blog today. I hope you found some inspiration!


Be sure to tag us Doodles Paper Playground on social media -
if you create a project with our Sparkle Blends. 

There is also a new Facebook group where you can share 
creations you have made with Sparkle Blends!
Come check it out, share some inspiration!

All of our Sparkle Blends can be purchased only at the 

Monday, November 25, 2019

Warm Christmas Wishes

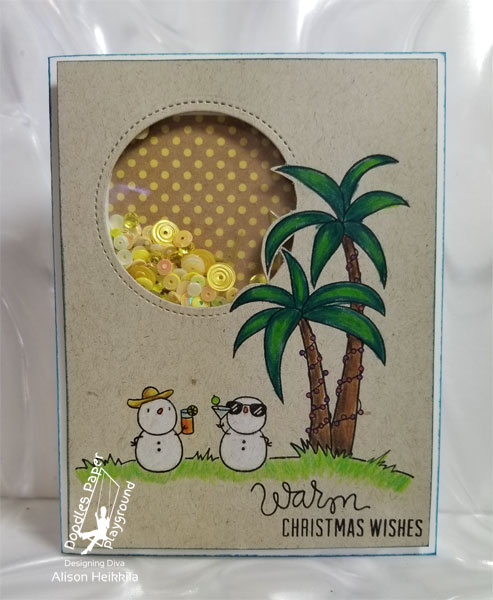
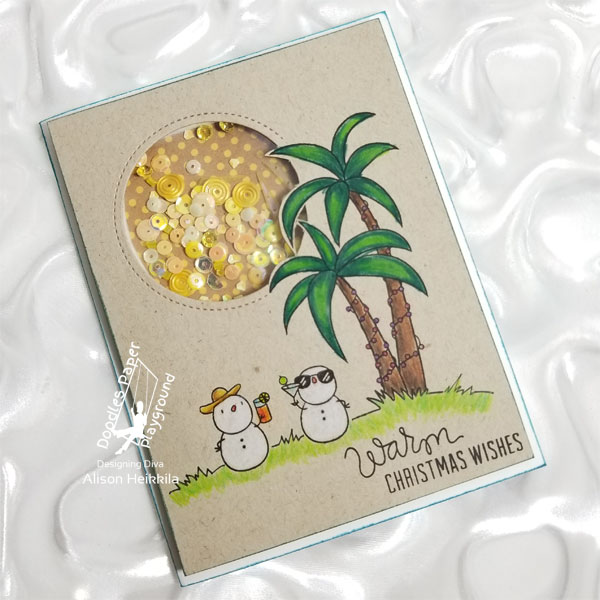
Greetings! Alison here. I've got a Christmas shaker card to share with you today that's rather non-traditional. It's got snowmen....but they're acting rather unusually. Take a look.
These two are having quite a good time under the sun, aren't they? They must have some Elsa magic...
I created this little scene on Neenah Desert Storm cardstock, because I was really in the mood to do a little coloring with pencils. And I love how colored pencils look on Kraft cardstock. The snowmen are from Mama Elephant's Little Snowman Agenda stamp set. The palm trees and sentiment are from a Simon Says Stamp set called Warm Christmas Wishes. I lengthened the grass line that's under the palm trees to make the little scene more uniform. Then I colored the whole scene with my Tombow Recycled Pencils.
I partially die cut a circle (from Elizabeth Craft Designs) to represent the sun. To complete the shaker window, I cut around the tree using an X-Acto Knife. My sun was completed with the Citrine Sparkle Blend which is full of happy yellow sequins, gems, confetti, and shards, and then I backed it with a piece of Kraft cardstock with yellow polka dots from Doodlebug. I mounted my shaker panel on to a white card base, but I realized I wanted to add a touch of blue to it, so I carefully inked the edges with Tumbled Glass Distress Ink.

I love the pretty shades of yellow in the Citrine Sparkle Blend. I think it's perfect for a sun. I also like this sunny take on a Christmas card. There are so many little snowmen in the "Agenda" stamp set, that I can think of a whole bunch of other cards for them with various scenes. A set of cards like that would make a fun gift! Please visit the White Rose Crafts shop to see all of the Sparkle Blends that are available right now. They also have a huge pre-Black Friday sale going on. Thanks so much for stopping by. Have an inspiring day!

Saturday, November 9, 2019

Using Black on a Holiday Card

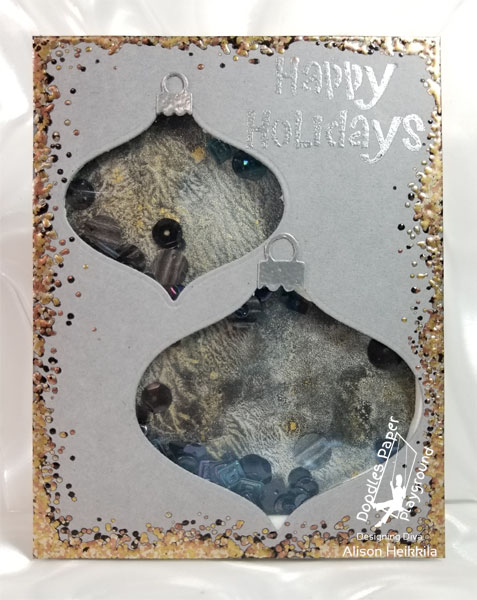
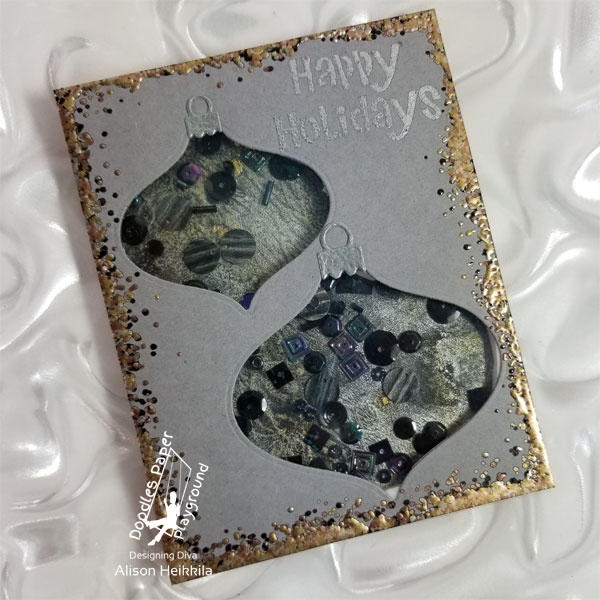
Hello! Alison here. My card for today was created because Amber, the owner of Doodles Paper Playground challenged me to make a holiday card using the "Dragon Glass" Sparkle Blend which is entirely black. Challenge accepted!
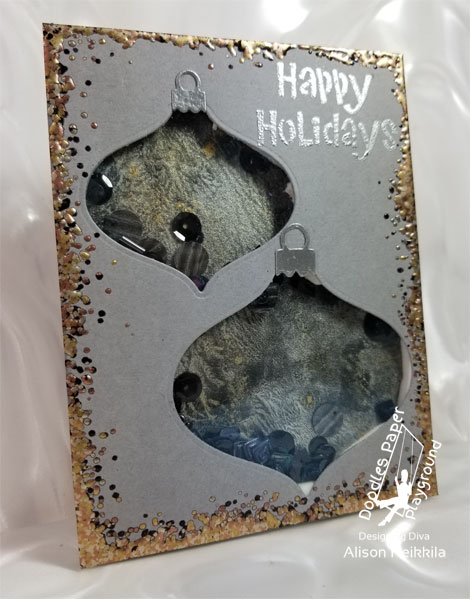
I originally thought that I would go super-goth with the card, but then I thought it would be fun to do lots of metallics and make it more elegant than goth. Though I may still do that on a future card. I used a couple of older ornament dies from Stampendous to make 2 shaker windows. The ornament tops were done by applying embossing ink and silver embossing powder to a scrap piece of cardstock, and after it melted, I die cut the tops.
I used a "Happy Holidays" stencil (also from Stampendous) and inked it with VersaMark and sprinkled the same silver embossing powder on to it. I love the shine! Around the edges of my top layer, I added even more VersaMark ink and sprinkled on the "Seasonings" embossing powder, which is a favorite of mine. Do you see all of the different colors in it? It's even more beautiful in person! If you ever try this powder, I highly recommend heating it from underneath, so that the large, chunky granules don't fly off of your cardstock.
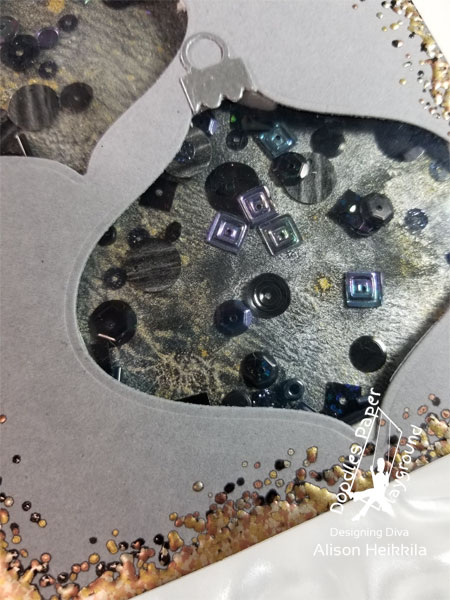
Behind my shaker window, I didn't want to just use black cardstock. I wanted more metallics. So I squirted some Golden Glitz and Silvery Shimmer Delicata Re-inkers on to a Gelli Plate and mixed them a bit with a brayer. Then I laid my black cardstock on top and rubbed it to apply the color. I love the end result! And it really makes the Dragon Glass Sparkle Blend stand out. In the photo above, you can see the unique shapes, sizes, and styles that are in it.
There is a LOT of shine on this card, so it was tough to photograph. It looks better in real life, but I think you get the idea.

This is definitely not a traditional holiday card, and that's one of the reasons why I like it so much. The sparkle and shine are another reason. What products do you use to make your holiday cards non-traditional? Or, do you prefer to stick to the classics? Be sure to head over to the White Rose Crafts shop to see all of the Limited Edition Sparkle Blends from Doodles Paper Playground that are currently available. Thanks so much for stopping by. Have an inspiring day!

Sunday, May 26, 2019

Boughs of Holly in May

Hello! Alison here. Today I have a Christmas shaker card to share with you. I know, I know....it's almost the unofficial start of Summer, but I find that I don't always have enough handmade cards to give over the holidays, so why not start now? And shaker cards with Sparkle Blends from Doodles Paper Playground are perfect for the holidays.
I often like to color images and just keep them together until I feel like putting them on a card, or I have inspiration. I colored this sweet little image named Sami from A Day for Daisies quite some time ago, and just never put it on a project. I knew it was perfect for a shaker.
Since I had pre-colored Sami, I chose my Sparkle Blend based on the colors I used on the image. Boughs of Holly was just perfect! This is a traditional Christmas colored Blend, but I really love the various shades of green in it. There is lots of sparkle and shine, plus some stars, holly leaves, and flowers.
I backed my shaker window with a small gingham, and cut the window with an oval die from Lawn Fawn's Magic Color Slider Die set. That die set has 3 shapes that are just perfect for shaker cards.

I love to mix patterns, so I added some polka dot cardstock that was cut with an older Avery Elle banner die. I also adhered a few additional sequins to the front of the card for additional sparkle. My sentiment is from Stampendous.
Do you get your holiday cards started early? When do you usually begin working on them? This is a bit early for me, but you gotta strike when inspiration hits, right? Please be sure to visit White Rose Crafts to see all of the currently available Sparkle Blends from Doodles Paper Playground. Sparkle Blend are all Limited Edition, so once they're gone, they're gone. Feel free to use my discount code, "Alison 15" to save 15% off of your entire purchase at White Rose Crafts. Thanks so much for stopping by. Have an inspiring day!

Monday, December 10, 2018

Season's Greetings

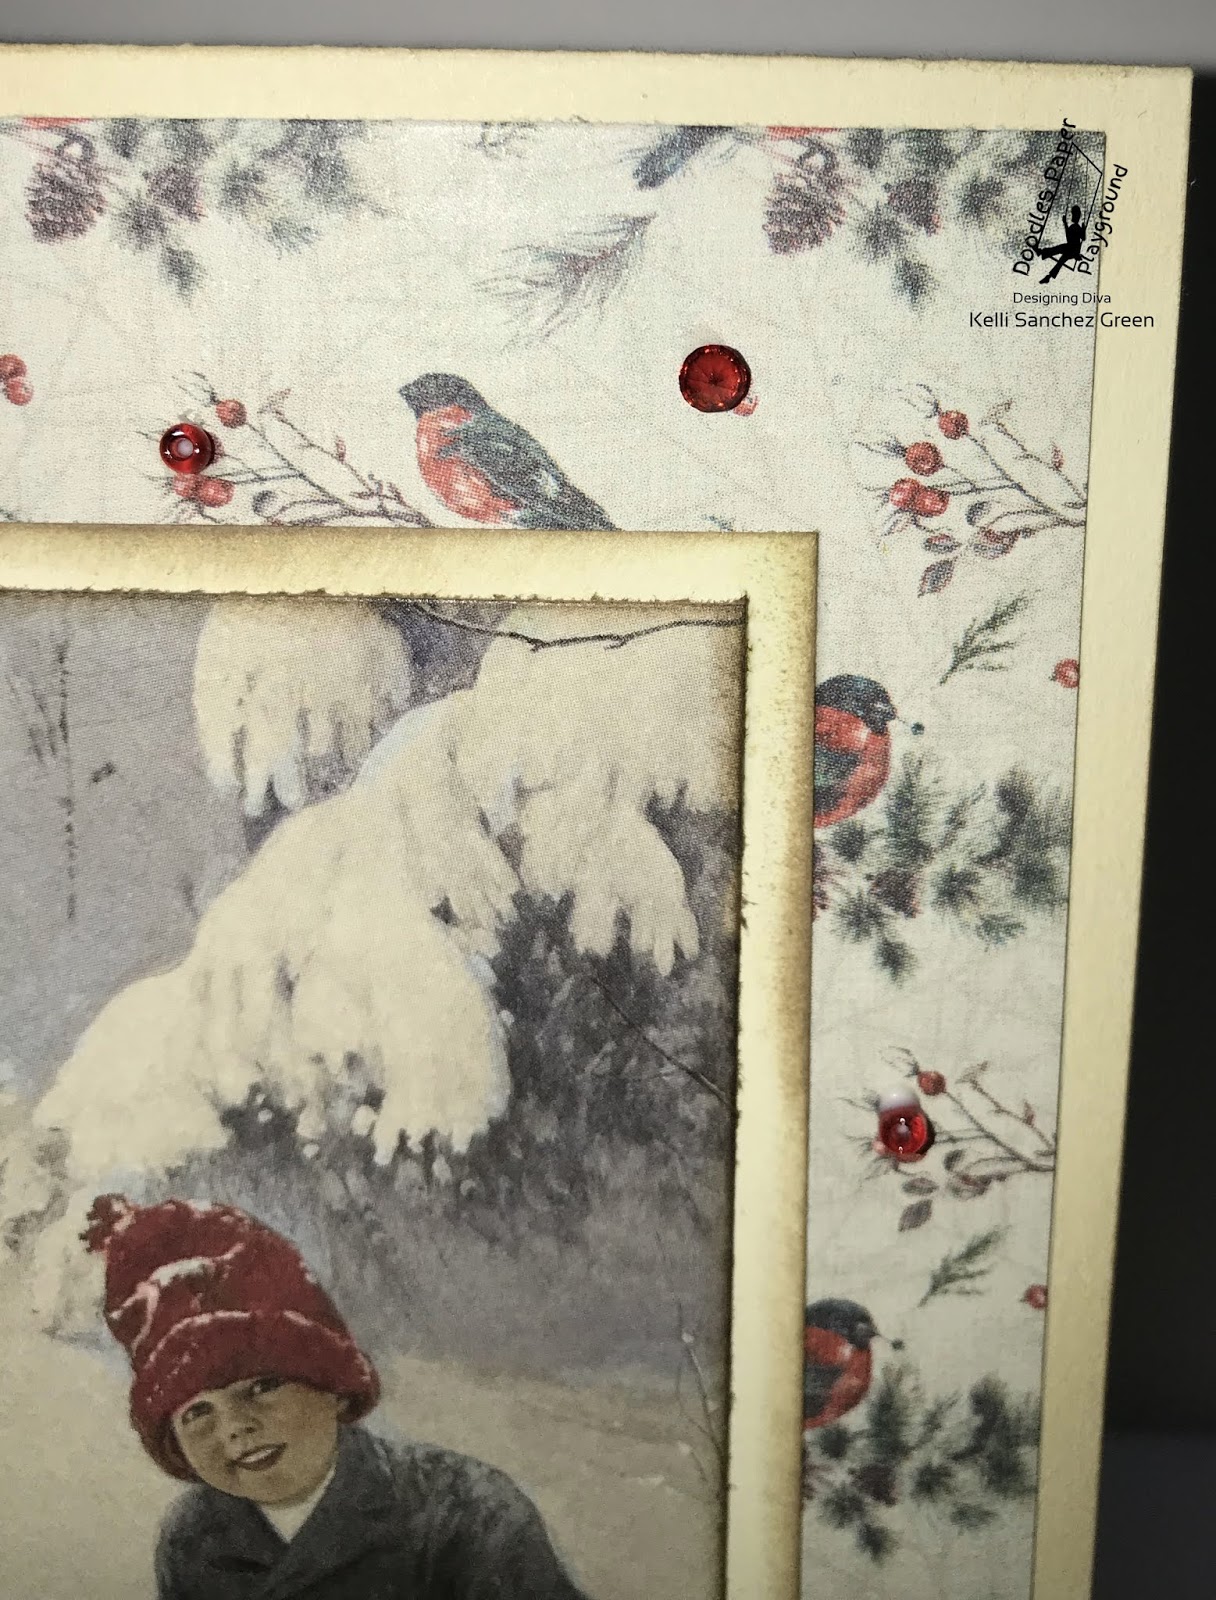
Hello, Kelli here today with a Holiday card to share with everyone using sequins and beads from the Crown Jewels Sparkle Blend!

The patterned paper I used is from the Authentique Solitude set.


I love the soft vintage feel of this paper collection! 
I've added tiny beads and gems from the sparkle blend collection all around the card to accent the berries and also to make the red stand out a bit more. 
Look at the height of some of those gems!!!  I love them and yes I picked through my whole stash to find them!!!
Here is the inside of my card.  I put the sentiment here because I didn't want to distract from the front of the card.  I used a die I have had for a while and another selection of the patterned paper. 

Thank you for joining us today at DPP!  


Wednesday, December 5, 2018

Gifts for Everyone!!!

Hey Guys,

Kelli here today.  I hope everyone is enjoying this Holiday Season!  I know I am!  At this time of the season I am all about last minute gifts, especially when I find a box of craft items I haven't seen in over 3 years!  How does that happen you ask, well for me it happened because we moved from Idaho to Virginia and it just got put in a closet that until this year had not been purged and organized!  Anyway, I found these little ornaments that I thought would look great on a small tree or used as wine glass decoration things, (you know those things that go on a wine glass so you know which one is yours.  What are they called?), or as a purse ornament for the season. So that's what I did.

I took these ornaments:

Then I started making things with them.  I couldn't just put them on my small trees like they were, I am no heathen!!!  LOL

So I added some sequins in them and they became wonderful ornaments with lots of color! 
Here is one I made using Vixen sequins mix.


Then I Wine Glass charms(I finally remembered the name)!  So I took out some rings I had from years ago when I made my sister some charms for a gift. Here is one I made using Limonade sequins mix. 


Lastly, I thought I needed some bling for myself.  Actually I saw someone in the store who had charms hanging off her purse strap and I thought that it was cute so I wanted to make one for myself. Here is what I made using Blue Over You Sequins mix. 


Thanks for joining us today and remember to get your DPP sequins blends at White Rose Crafts!