Monday, March 30, 2020

Planner Shaker Page


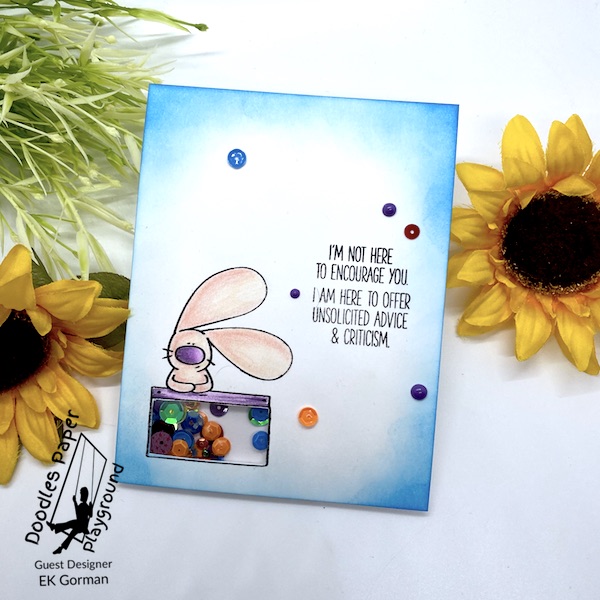
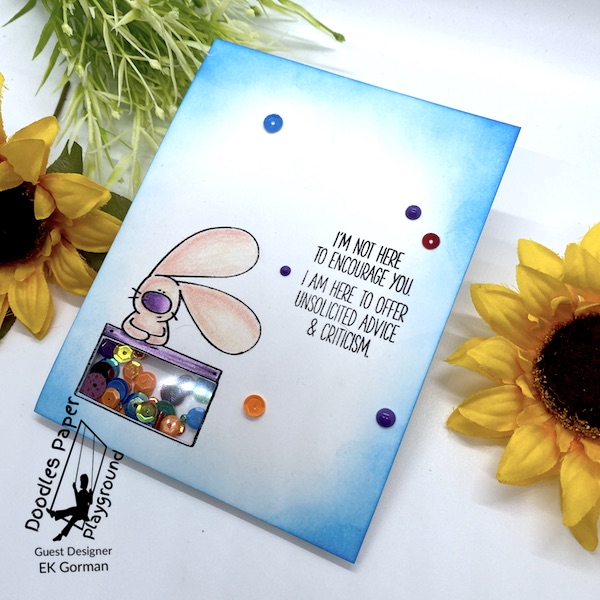
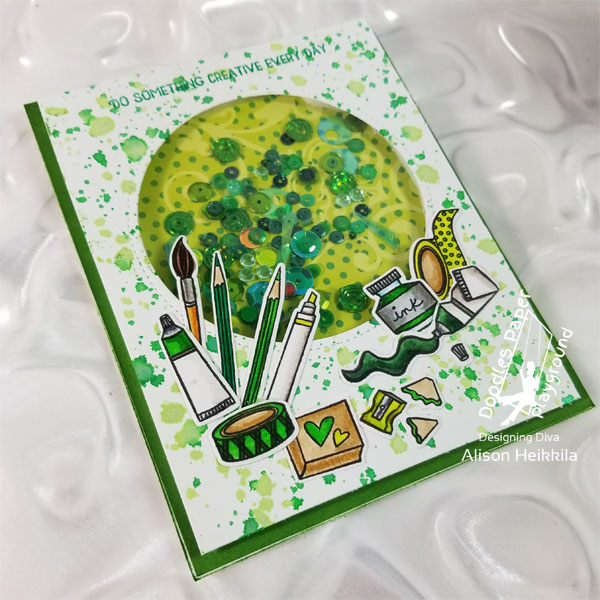
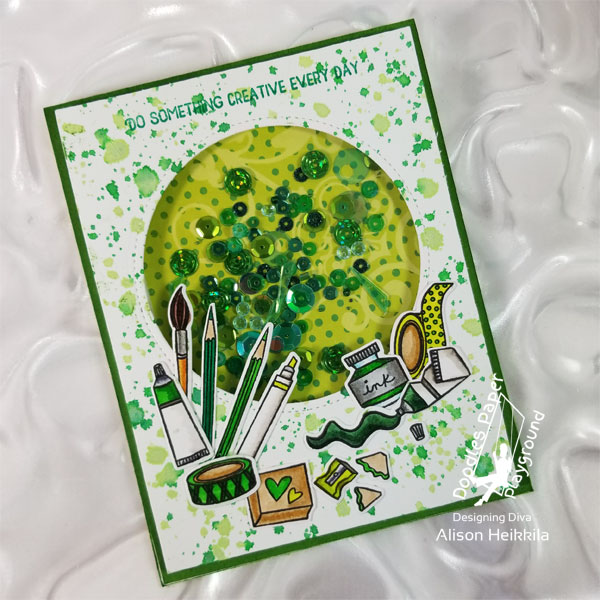
Ink Stained Roni here with you today and I wanted to share a planner idea with you...shaker divider pages! I have recently started a new planner - I wanted one place to keep track of all of the art and crafty ideas I come up with. I am making it all by hand so I want to include some fun art inside - I thought shaker dividers would be a fun start.


I used a scrap piece of clear vinyl which was folded in half then I traced out the size and hole placement on the top layer. I cut it out, punched the holes and stitched it closed on the top and bottom leaving a 1" hole in the center of the two middle rings.


I filled the pouch with Sweet Treats Sparkle Blend then stitched up the hole.


When finished I showed it around to some friends and we couldn't stop shaking it. It is SO much fun playing with this divider page....I'm afraid now I will be spending far too much time playing with the divider and not enough time thinking of and writing down crafty ideas!

Supplies:

Doodles Paper Playground - Sweet Treats Sparkle Blend
Clear Vinyl
Sewing Machine & Thread
Hole Punch


Thursday, March 26, 2020

Unsolicited Advice

IMG_E9572
Hey Friends!  It's Ek am back on the Doodles Paper Playground guest designing today with one of the latest released Sparkle Blends.

I wanted to try and create a really simple yet fun card using the brand new Grandma's Knit Sweater Sparkle Blend mix.

Grandma's Knit sweater

IMG_E9567
I started by stamping out my image and sentiment onto some heavy weight cardstock.  Then using my craft knife, I trimmed out the section of the booth.

IMG_E9569
After coloring my image with my colored pencils, I added the sparkle blend mix into the shaker portion of the card.

IMG_E9573
Finally, I blended some ink around the edges of the card and adhered a few extra sequins onto the card along with some Nuvo Drops. 

IMG_E9574
I know my project is super simple today, but I hope it brings a smile to your face! 

Let us know in the comments below what your favorite way to use Sparkle Blends are?  Until then, Happy Crafting.

Wednesday, March 25, 2020

Mushroom House

Hi, it's Rhiannon. You know that I love fairies and fairy houses, so I really like this old stamp from Stampendous. I used two Sparkle Blends from Doodles Paper Playground for this card, instead of one, like I usually do. I used Sweet Boy for the sky, and Emerald for the grass.
I stamped the mushroom house in brown so it would be softer and more natural looking. I colored it with Memento Markers from Imagine, like I always do. I had stamped this on a full card front, but I decided to cut off the bottom after I finished coloring it, so that I could put a green textured paper that looks like grass under it.
The Sweet Boy Sparkle Blend was perfect in the sky because of the butterflies in it. I like how they are fluttering around the mushroom house. The Emerald Sparkle Blend is great for the grass because it has different shades of green in it. I used the lighter colors of sequins in Sweet Boy, and the darker sequins in Emerald.

Making this card was a lot of fun, since I love fairy houses. I didn't want to use one Sparkle Blend because I wanted to keep your eye moving all over the card and not have it "heavy" in one place. I'll have another card to share with you soon. You can go and visit the Sparkle Blends Shop on Etsy. Thanks for coming, and stay safe.

Tuesday, March 24, 2020

Sequin Clusters

Sequin Clusters


☆☆☆☆☆☆☆☆☆☆☆☆

So my project this week isn't so much the card but the 
embellishments on the card. 

I was surfing Facebook and came across a post about sequin clusters.
Basically it is where you glue sequins together to make a bigger embellishment.

I knew I had to try it right away.

I found that the sparkle blends are actually perfect to use while making these because they have lots of different sizes and pieces in the blends.

My favorite pieces are the micro glass beads, you can see them on the yellow cluster. . . I think they look so good!


☆☆☆☆☆☆☆☆☆☆☆☆

I made a super quick card with the 
 sequin cluster that I made with the Love Hearts sparkle blend.

I love that you can still add single sequins from the blend 
and they match perfectly!


☆☆☆☆☆☆☆☆☆☆☆☆

For this project I used the Love Hearts sparkle blend.

There are more great Sparkle Blends over at the 

You can use my code FAWN10 for 10% off your order

There is also a Facebook group where you can share 
creations you have made with Sparkle Blends!
Come check it out, share some inspiration!


Thank you so much for stopping by!
Now, Get Out There and Create Something Amazing!!


☆ Facebook ☆ Instagram ☆ YouTube ☆

Monday, March 23, 2020

You Make Life Sweet

IMG_E9517
Hey Friends!  It's EK and I am guest designing again today with Doodles Paper Playground and using Sparkle Blends in a new and unique way.  Instead of creating a shaker card, I tried something a little different.

IMG_E9498
I started by stamping out an image and coloring it in with copic markers.

IMG_E9499
I then filled in the ice cream with glossy accents in a very heavy hand.

IMG_E9500
I then dump a ton of the new  Little Piggy Sparkle Blend onto the wet glossy accents.

IMG_E9501
I dumped off the excess and pressed the blend into the glue a little firmer. 

IMG_E9502
Then using more glossy accents, I squeezed more over the blend and let dry.

IMG_E9518
What you get is a very shinny locked in collection of blend. 

IMG_E9519
Let me know in the comments below what you think of this technique.  And make sure you pop over to the Doodles Paper Playground Etsy Shop to see all the different blends they have available.

Want to save 10% off your order, then feel free to use the code EKGORMAN10 to get a savings!

Sunday, March 22, 2020

A Study in Green

Hello! Alison here. I have a very green card to share with you today. Last year, I had made a card similar to this in red last year. You can take a look at it HERE. I love playing with color, so eventually I'd like to do a version of this card in many colors, but this time green won out. I used the Emerald Sparkle Blend from Doodles Paper Playground, plus many of the stamps from Hero Arts' My Monthly Hero Kit from last May (it's still available HERE!).
So I knew I was doing a green card, so I just pulled out a bunch of the greens (plus some grays) from my Zig Clean Color Real Brush Pens set and started to color up a bunch of the stamped images. Thank goodness this kit comes with dies, because I would NOT want to cut all of these teeny (and fabulous!) little tools out by hand. I also die cut my window panel with a circle so that I could start arranging my die cuts.
I found a great scrap of old Prima paper that I used behind my shaker window...I thought it went perfectly with one of my washi tape die cuts. I also thought that a plain white card wasn't exciting enough. So I grabbed Cottage Ivy and New Sprout Fireworks! Spray from Imagine, and flicked it all over the panel before I adhered my colored images. You can see in the photo above just how pretty the Emerald Sparkle Blend is. I really love all of the fun shades, the unique "shards" and confetti sequins. Before assembling the card, I inked the edges of my card base with Mowed Lawn Distress ink.
After I was finished assembling the card, I thought that it really needed a sentiment. I took out the Altenew Crafty Friends stamp set and chose one that I thought would fit on top well, then I stamped it with StazOn pigment ink in Shamrock Green. I chose the StazOn for the color and the opacity.

So now I've done red and green for this style of card. Which color do you think I should do next? I'd love to hear your suggestions! Please be sure to visit the Sparkle Blends Shop over on Etsy to see all of the currently available Blends. Thanks so much for stopping by. Have an inspiring day!

Friday, March 20, 2020

Fairy Garden

Hi, it's Rhiannon. I really love fairies, and I wanted to make a fairy card to share with you today. I chose the Pixie Dust Sparkle Blend from Doodles Paper Playground first, because I knew it would work with anything I made.
I started by stamping my fairy house and fairy, which is from Lawn Fawn's Fairy Friends stamp set. Next I colored them (with Memento Markers), and drew where the grass line should be. Then I drew the grass with the Memento Markers called Bamboo Leaves, Pear Tart, and Cottage Ivy. It took a while, but it came out really nice. Next, I made a mask of the fairy so I could stamp the tulips that's behind her. I finished stamping the rest of the flowers after that.
It was time to color in the flowers, and I added the little mushroom, which I inked up with the Ladybug marker. Next I made the path. I drew in every stone and then colored them. That took a long time too, but I am really proud of how it looks.
After I finished coloring the picture, I added Wink of Stella (a glitter marker) to the fairy, the door of the house, all the flowers and a little in the sky. You can't overdo it! Now it was time for me to pick out the sequins I wanted to use from the Pixie Dust Sparkle Blend. I really like the holographic star bust sequin that I put in the fairy's hair and in other spots of the card. I attached all of the sequins with On Point Glue. I cut out a cream card base, folded it, and applied Glitz Glitter Gel from Gina K Designs in White. Like I said, you can't have too much sparkle!

I like how the card ended up after all of the work. My favorite part is the path. I also really like how i colored the fairy's wings. I used a few pastel colors to make them look iridescent. And the Pixie Dust Sparkle Blend makes the scene feel magical. Thanks for coming! Have a good day!

Thursday, March 19, 2020

Wine Run

IMG_E9514

Hey Friends!  It's EK popping in to guest design.  Today I am creating a shaker card using one of the newly released Sparkle Blend mixes from Doodles Paper Playground.  Today I thought it might be fitting to create a card with a bit of humor (in light of us all needing a laugh), and frankly a little irony.

IMG_E9515

I pulled out the Champagne Bubbles Sparkle blend to fill this die cut wine bottle and just love how they sparkle within this copic colored image.  I also added a few extra sequins from the Champagne Bubbles blend around the card frame to give it a little extra pop.

IMG_E9516

Have you been over to the brand new Doodles Paper Playground Sparkle Blend Etsy Page?  There are tons of these limited edition blends available for you to pick up, but they are all on low supply so make sure you pop over and see what they've got.

Want to save 10% off your order, then feel free to use the code EKGORMAN10 to get a savings!

Tuesday, March 17, 2020

You're My Lucky Charm

You're My Lucky Charm


☆☆☆☆☆☆☆☆☆☆☆☆


I stamped all my images from the Lawn Fawn Stamp set My Lucky Charm 
and colored them with copic markers. 


I cut my panels and stamped my sentiment.


I added a single layer of foam tape and placed my images on the top panel, 
it is much easier to add them before assembling your shaker. 


I measured out my sequins and added the top panel. 
I also added a few sequins to the front of the card for that extra sparkle!

☆☆☆☆☆☆☆☆☆☆☆☆

For this project I used the Good Luck Charm sparkle blend.

I love this blend! Green is my favorite and I love the bits of gold in it!

☆☆☆☆☆☆☆☆☆☆☆☆

There are more great Sparkle Blends over at the 

You can use my code FAWN10 for 10% off your order

There is also a Facebook group where you can share 
creations you have made with Sparkle Blends!
Come check it out, share some inspiration!


Thank you so much for stopping by!
Now, Get Out There and Create Something Amazing!!


☆ Facebook ☆ Instagram ☆ YouTube ☆

Thursday, March 12, 2020

Happy St. Patrick's Day Shaker Shamrock


Ink Stained Roni here with a fun Shamrock Shaker card for you just in time for St. Patrick's Day!

This shaker features one of the new Sparkle Blends - Gold Rush which is perfect for all sorts of themes but works especially well when in search of Leprechauns and their pot of gold!


I started off by making the shaker element which is a nifty little kit from Creative Embellishments. It comes with all of the necessary parts and pieces to make one completed shaker including the back piece, 3 outline frames and the clear window.


I started off by covering the shaker back/base with Jade/Gold Glossy foiled paper by Rinea. Two of the outline frames were then glued to the shaker back. I then filled the shaker with the Gold Rush mix and a few shamrock paper punchies cut from more foiled paper.  The clear window piece was secured to hold all the shakie bits in place and the final frame was glued on.  I colored the frame and sides with a green metallic marker for an extra bit of sparkle.


I set the shaker aside and embossed a large sheet of Rinea Emerald/Gold Glossy foiled paper in a Celtic design then swiped away the color using Ghost Ink 2.0 (also from Rinea).  This panel was affixed to a card base covered with Gold/Gold Starstruck foiled paper.


A die-cut oval was added to the card and the shamrock shaker was then affixed to the card.

I hope you've enjoyed this wee bit 'o inspiration and sparks your creativity!
Have a lovely day friends...

Supplies:

Creative Embellishments - Shamrock Shaker Kit
Rinea - Jade/Gold Glossy, Emerald/Gold Glossy, Gold/Gold Starstruck foiled papers, Ghost Ink 2.0
Spellbinders - Oval Die, Embossing Folder
Card Base
Shamrock Paper Punch